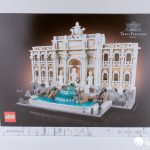
Can you believe LEGO’s Architecture theme has been going for 17 years now? That would make it old enough to get a driving license in the UK! It’s testament to the diversity of the theme that in all those years, you can count the number of buildings to receive repeat sets on one hand. We can add another finger to that hand now, as 21062 Trevi Fountain re-visits one of Rome’s most famous landmarks. The first iteration of this set – 21020 – included 731 parts, but that number has now ballooned to 1,880 pieces in the 2025 version. It will release March 1st, but you can pre-order it from LEGO’s website now for US $159.99 | CAN $209.99 | UK £139.99. You may also be able to pick it up from eBay or Amazon, once it has released.

The LEGO Group sent The Brothers Brick an early copy of this set for review. Providing TBB with products for review guarantees neither coverage nor positive reviews.
The box and contents
Despite the fact it includes nearly 2,000 pieces, I was surprised how big the Trevi Fountain’s box is. Then again, most of the Architecture sets I own are on the smaller side!


Taking the lid off – for this is a box in two parts – reveals 15 numbered plastic bags. LEGO have had paper bags for a while now, so I wonder how long we’ll have to deal with the plastic for.


The envelope containing the instructions is paper, at least. It’s a new look from what I’m used to seeing. For my review copy, I did find that the back page of the instructions had accidentally been glued to the seam at the top.
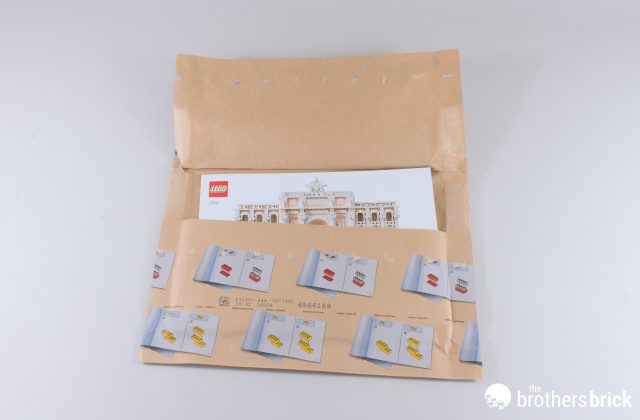

No harm done, though, and we can open up the instructions to read a bit more about the Trevi Fountain, this LEGO set and its designer. I did lose my working title for this review to that first page, though…


There’s a handy guide to what each element of the fountain is, which I really appreciate. It’s especially useful for Renaissance- and Baroque-era edifices like this one, which are often full of references to myths, legends, epics, and the characters and creatures therein.

Rome may not have been built in a day – in fact the real-life Trevi Fountain took 30 years to build. How long will this one take? Let’s find out!
The build
Of course, things start off with the base. We get an immediate idea of the footprint of this set as a result.

As we build it up, we have a neat trick using half-stud offsets to build some stairs at either end of the concourse. Spoiler: half-stud offsets will become something of a theme in this review!


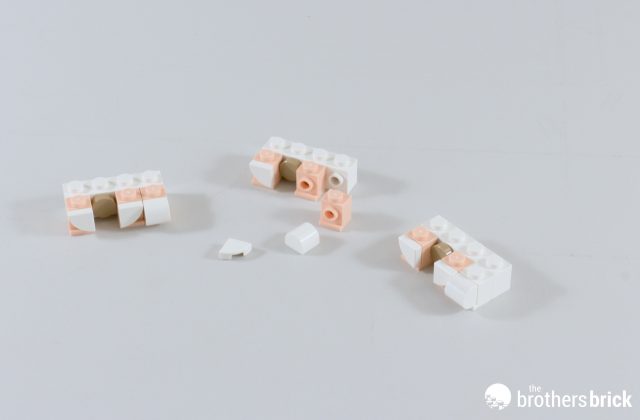
There’s a fun little Easter egg as we start bag three. One of the most famous traditions concerning the fountain is to throw in coins – the instructions mention several little factoids around this subject as you build. So in reference to that fact, a couple of printed coin tiles are hidden underneath the fountain’s foundations.

We’ve built up quite a bit around them besides – here’s our final look at the base before the surrounding structure is made.

Just like Anita Ekberg in La Dolce Vita, let’s get right into the fountain itself! The varying depth of the water is represented by gradually deepening shades of blue covered with tiles. It’s a technique often used by the wider LEGO community’s MOCs, so it’s nice to see it show up here.

This set is pretty light on re-colours, but these two curved bricks are new in trans-blue. They help to round off the edges of the water.


Let’s keep moving on up and start on the next tier of the fountain. This one is built on its side, using bricks rather than tiles to represent the water.


The surrounding rock faces are also built on their sides, but we return to conventional studs-up building for the uppermost tier of the fountain. This is where we start to see some asymmetry come in, bringing a nice bit of variety to our build process.


All that water has to come from somewhere, and I learned from this set’s instructions that the water channels are hidden behind the windows on the lower floor. They’re what we’re building next in our 6th bag – one per side.

Those bricks with studs on the side are put to good use shortly afterwards, holding on some more rockwork.


With one of those on each side, and the retaining wall built, the fountain bit of the Trevi Fountain suddenly looks a lot more complete.

But so far we’ve been concentrating all our efforts on the front. The real Trevi Fountain backs onto the Palazzo Poli (or, more accurately, is built into the back of it, since the palace pre-dates the fountain). In this model, we have to settle for some plain white walls. Take note of those jumper plates, though – they’re going to make life interesting in a short while!

We’re now near the end of bag 8 – roughly halfway through the build. Here, we come across the first of many light nougat pieces. This colour is no longer reserved for minifigure skin tones as it once was, but for the most part the range of light nougat parts is still fairly limited. The most notable parts here are the newly-recoloured half-cylinder and half-dome panels.

We’re not going to use them all now, though – just the longer 1×12 plates. They form part of the first layer of the palace frontage, and since they’re affixed to the jumper plates, we’re now building at an odd number of studs wide rather than even.

The reason why is explained to us in the instructions later on. See if you can guess what it is without me telling you! In the meantime, we’ll start the first floor with a really interesting technique. The porticos around the windows make use of upside-down poles and even more switching between odd and even stud numbers. The end result looks great!


There’s a bit more to go on besides, helping these wall sections to stay nice and sturdy.

Time to fill in that gap in the middle – and the eagle-eyed among you may have noticed that this bit is still using an even number of studs. That does mean we can use the 6-wide half-cylinder for the central arch.


No time wasted moving onto the second floor, though! The construction of the outer walls is broadly similar to the ones we made earlier, with the only difference being in the Rococo ornamentation.

It’s attached to the main model in a similar manner, too. This close-up gives you an idea of how awkward that middle section might be. We’re still working a half-stud out on each side!

Not to worry, though – the next portion in bag 12 will help us to lock everything in. The left-hand side gives you an idea of how that will be done, with jumpers on top of the four columns. Take note of those white frogs in the bas-reliefs, too: they represent kneeling figures, next to the upright ones depicted by minifigure trophy elements.

Once all the jumpers and tiles are used up in the middle, we can cap it off with minifigure stands and studded tiles. The transition from even to odd is so seamlessly done – and it’s necessary as the frontage is split up into nine sections (three either side, plus the three central ones). In hindsight that should’ve felt obvious!

Time to raise the roof. There’s plenty more Baroque-style detailing up here, achieved with tiles and curved slopes…

… And sideways building. Right at the top is an interesting technique with clips and bars creating a balustrade.


The finishing touches come in our 15th and final bag, starting with something rather unusual. By my count, this is the 62nd Architecture set. But it’s the first one to include minifigures! There are three, representing the Goddesses Abundance and Health, and the fountain’s central figure, the Titan God Oceanus.

Oceanus’ chariot – depicted by a clam-shell element is pulled by hippocampi, one either side of the fountain. In LEGO form, these use an un-printed version of the hobby horse head that appeared in Series 23 of the Collectible Minifigure collection. Two more minifigures accompany them, albeit just the torsos this time.


The proverbial cherry on top of the cake is the papal coat of arms, capping off our build nicely.


The finished model
Before we look at the final model, here’s what the actual Trevi Fountain in Rome looks like…

Photo by David Iliff. License: CC BY-SA 3.0
… And here’s its LEGO counterpart! On the whole, it does a great job of replicating the fountain’s structure.

Certain details definitely come off better than others. Much of the fountain detailing sticks to the LEGO grid, and doesn’t quite have the impact the real thing does as a result.

But the Rococo detailing on the building is superb. The shades of light nougat and tan here represent the parts of the building that are normally in shade. The light nougat is a bit pink, and it does make it look a bit like a stately home. But the earlier 21020 Trevi Fountain took the more technically accurate monochrome approach, and between the two, I do prefer the more modern take.

As for the back… Well, let’s just say this is a model clearly designed to be seen from the front. Much like the real Trevi Fountain, in fairness.

Conclusion and recommendation
As I alluded to towards the start of this review, it’s been a while since I built an Architecture set around this price point. The ones I did have often felt expensive for what they were, but I’m happy to report that isn’t the case for the Trevi Fountain here. The main point of interest during the build was definitely the half-stud offsets, and the reasons behind it. It’s interesting to look at, picking out the details in the architecture and the way they’re made; even to a less experience builder, most of it can be worked out by looking from the front. But most importantly for a display set, it has visual presence. If you’re a fan of European (and specifically Italian) architecture, this is a good set to go for.

LEGO Architecture 21062 Trevi Fountain includes 1,880 pieces and will release March 1st. You can pre-order it now for US $159.99 | CAN $209.99 | UK £139.99, and you may also be able to find it on third-party reseller sites like eBay or Amazon.
The LEGO Group sent The Brothers Brick an early copy of this set for review. Providing TBB with products for review guarantees neither coverage nor positive reviews.
Check out our full gallery of pictures: