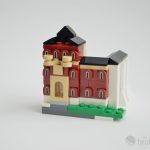
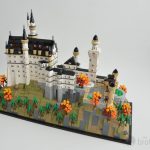
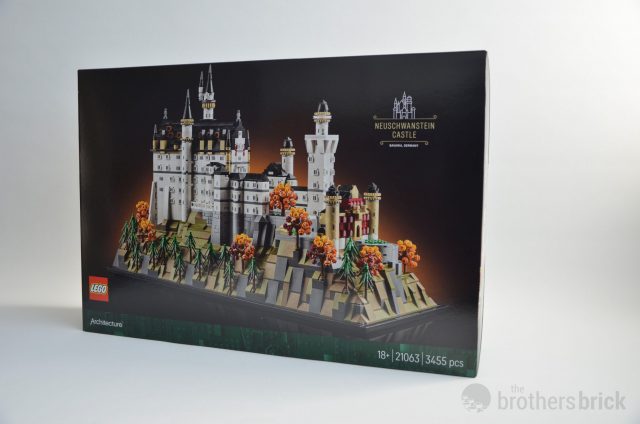
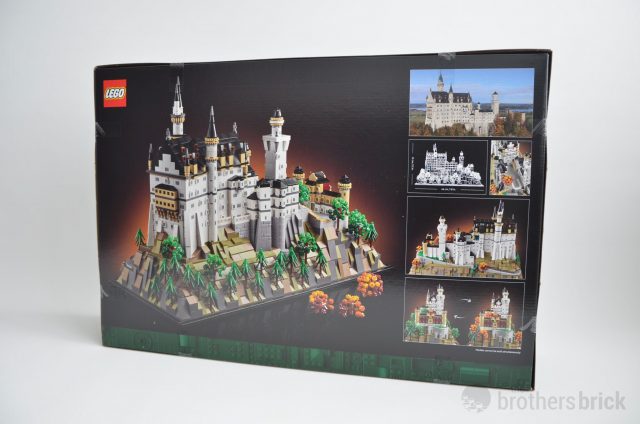
Neuschwanstein Castle is a real-life fairytale landmark that inspired Disney’s Sleeping Beauty Castle and was just added to the list of UNESCO heritage sites. On August 1, you can bring it home with LEGO Architecture 21063 Neuschwanstein Castle. We received an early copy of this beautiful set and are excited to bring you our review from guest writer Ids de Jong.
- LEGO Architecture 21063 Neuschwanstein Castle
- 3,455 Pieces
- Available August 1
- Buy for US $279.99 | CAN $349.99 | UK £239.99
The LEGO Group provided The Brothers Brick with an early copy of this set for review. Providing TBB with products for review guarantees neither coverage nor positive reviews.
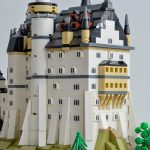
Neuschwanstein Castle
Schloss Neuschwanstein or Neuschwanstein Castle is one of the most iconic castles in the world and the jewel of Bavarian architecture. It was commissioned by King Ludwig II (Ludwig Otto Friedrich Wilhelm, 25 August 1845 – 13 June 1886), also called the Swan King or the Fairy Tale King, to use a retreat and to honor the famous composer Richard Wagner.
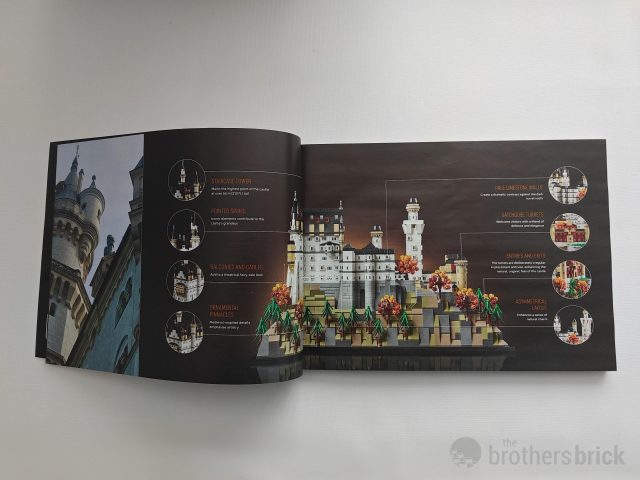
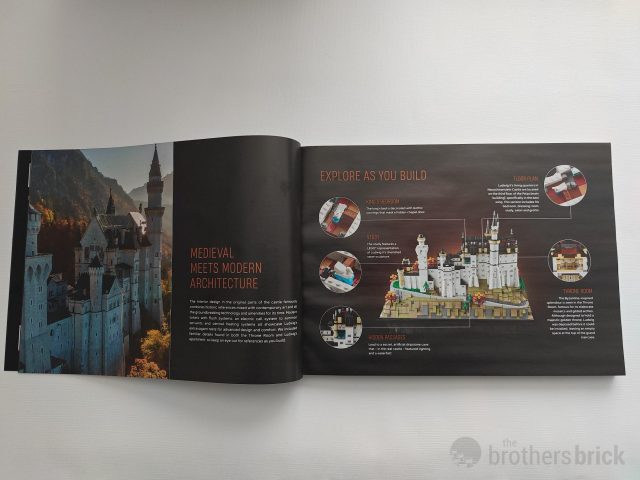
You can learn more about the castle and the LEGO design team’s commitment to representing it accurately in the first pages of the instruction manual. One thing you won’t learn though is that Neuschwanstein Castle is, as of July 15, a UNESCO heritage site. What perfect timing for LEGO’s tribute to this fairy tale castle.
Now let’s climb the foothills of the Bavarian Alps to check out this new Architecture destination. Hopefully we won’t get lost in the woods. (Although losing one of the 3455 tiny pieces could be a problem…)
Contents
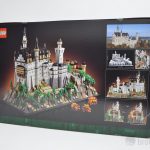
The box is the lift-the-lid variety. It leaves me feeling nostalgic for the old days with a box flap and a see-through cover to tease contents. I don’t think we will ever see those again, but there was something magical about seeing the parts without opening the box. The new experience with the paper bags is on the other spectrum. You open the box and see only white paper bags, no pieces at all..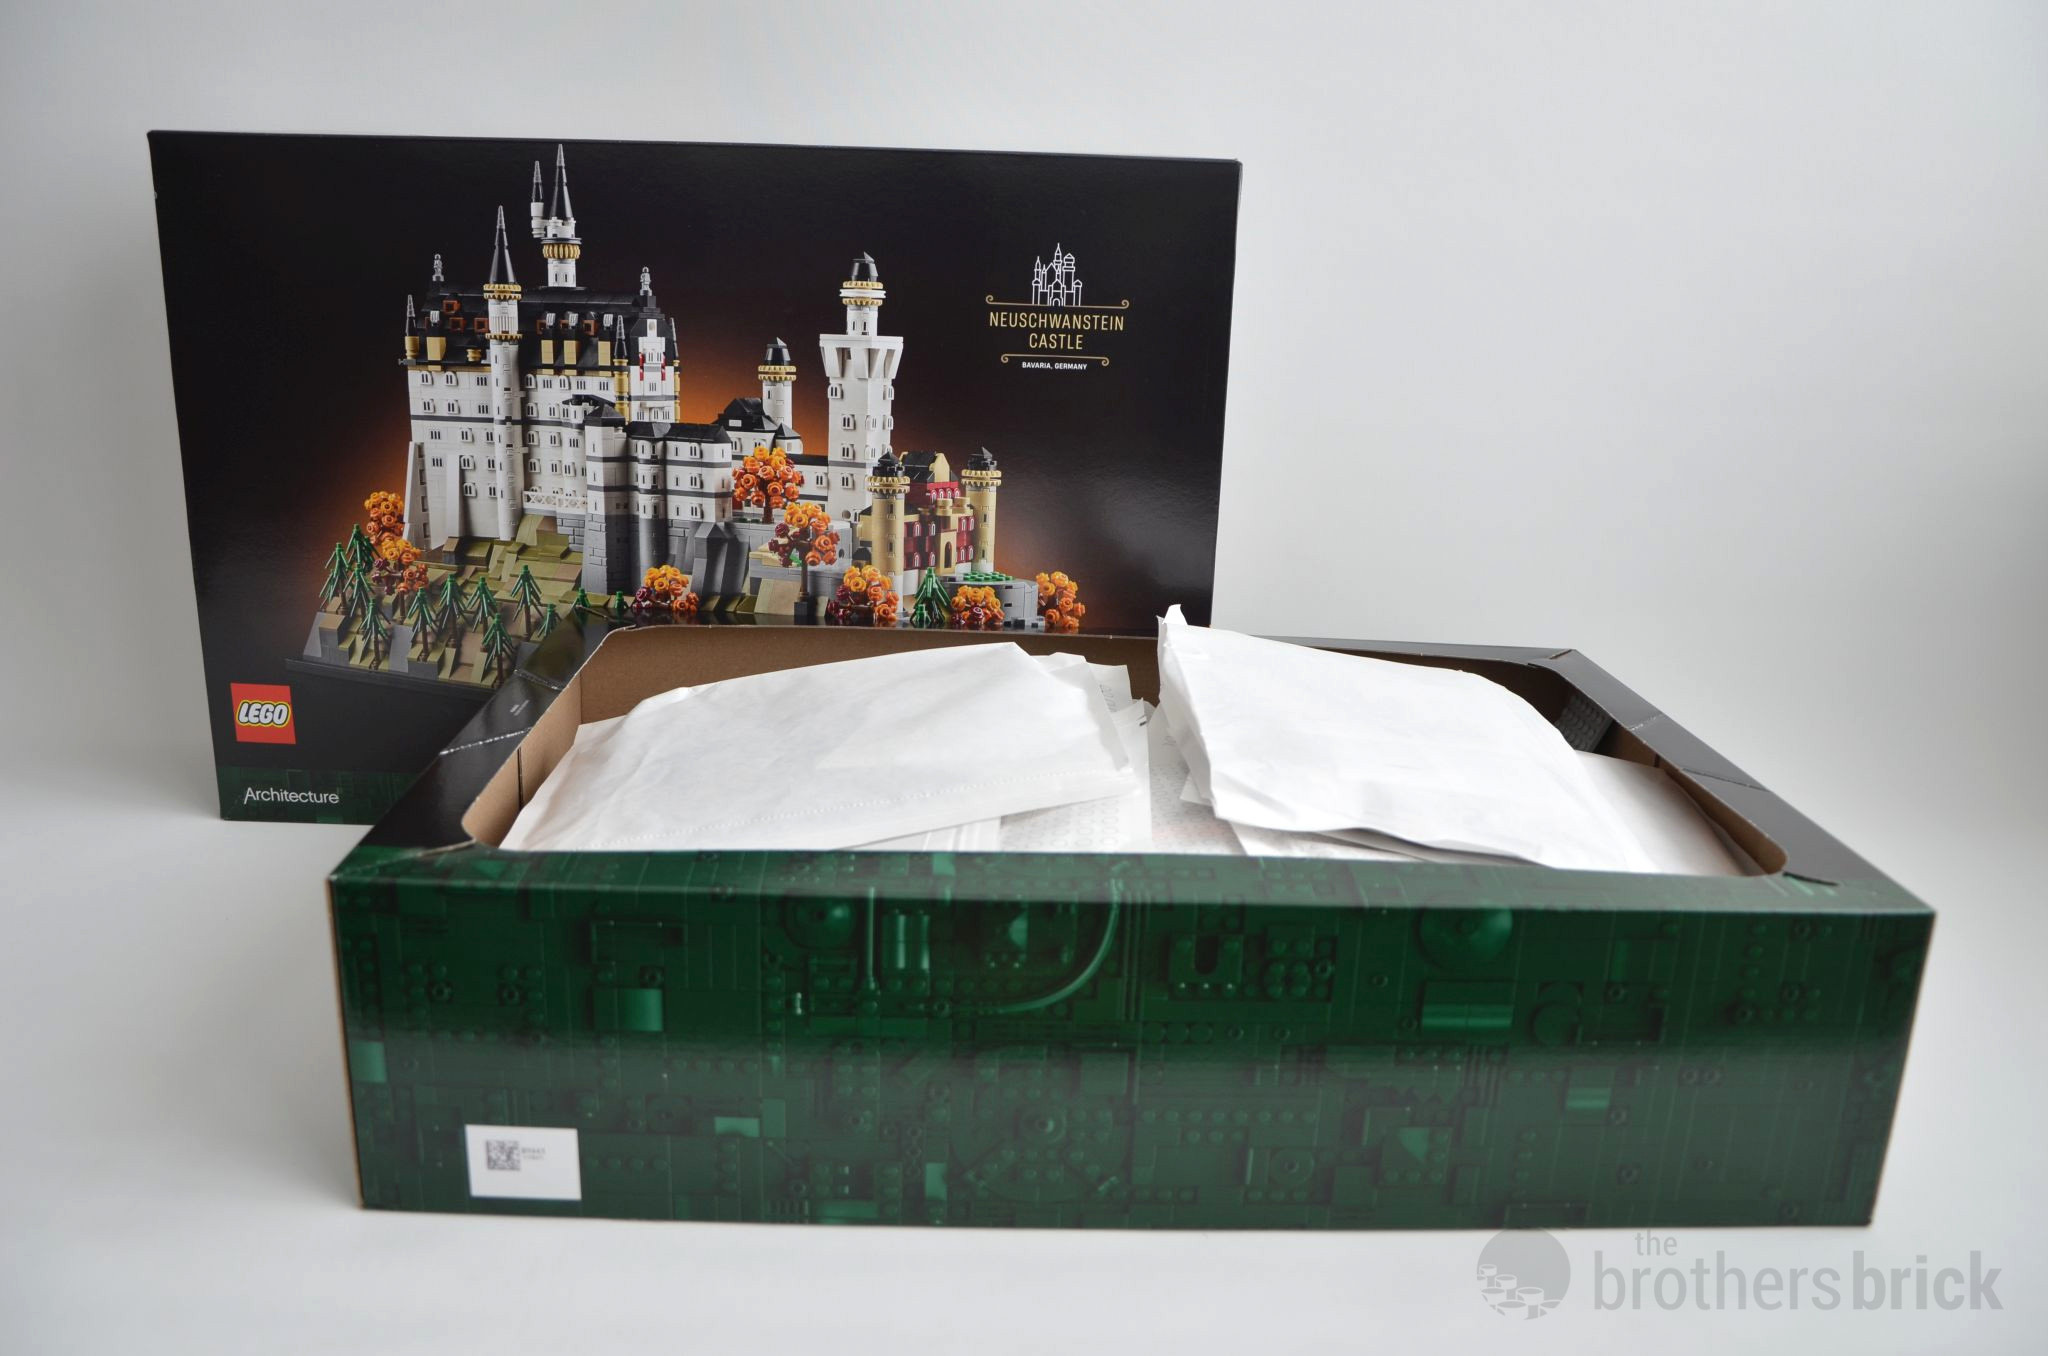
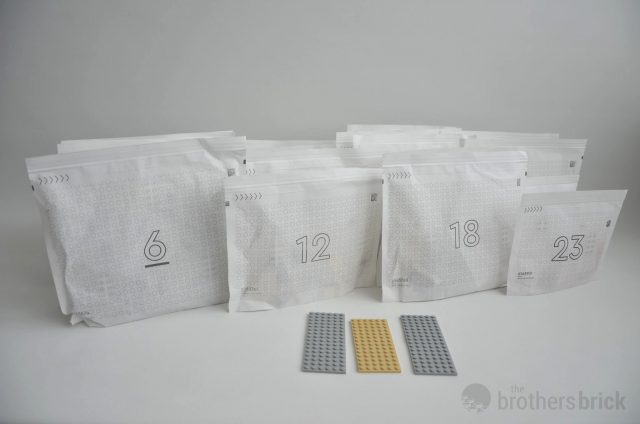
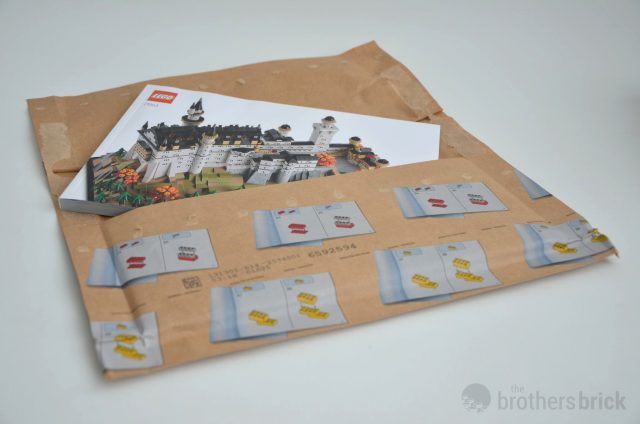
Emptying the box, you are greeted with a nice paper bag to keep the instructions pristine, 3 loose pieces, and 23 white paper bags.
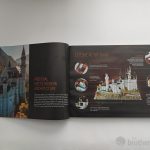
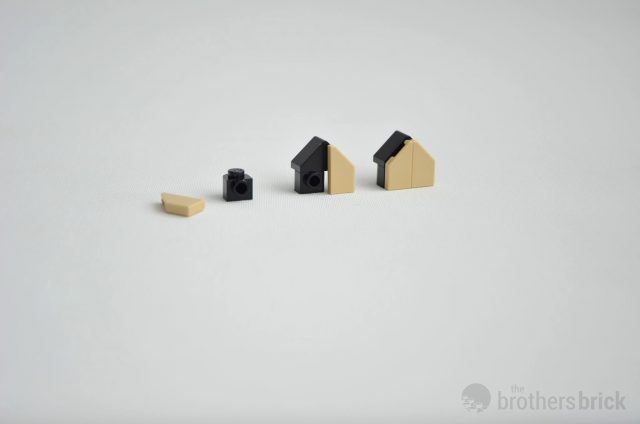
Printed Parts
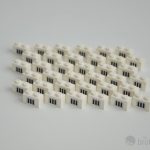
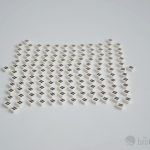
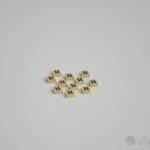
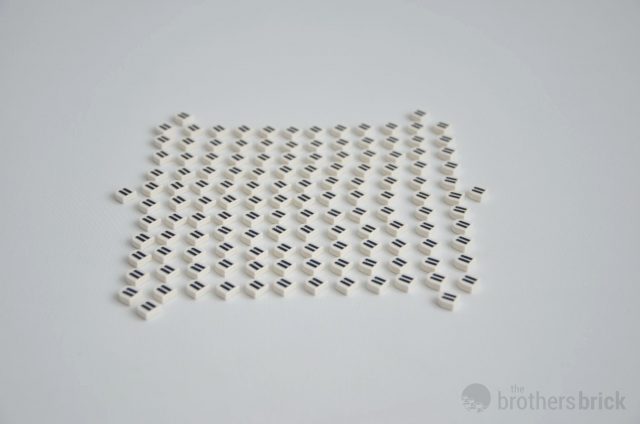
This deserves it’s own headline and has to be some kind of record for the amount of (small) printed pieces. A total of 237 are included (+ some spares). A total of 8 different printed elements are included in this set (apart from the name plate), and all are used to give the castle its iconic windows.
I can see these being used by MOC creators in microscale castle creations, which I might have to try myself if I can bear to take the set apart.

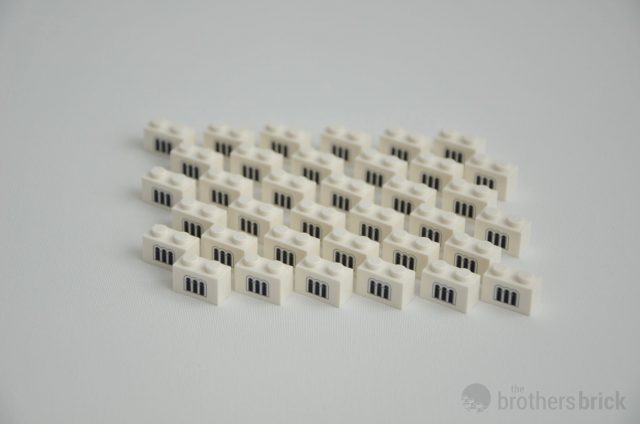
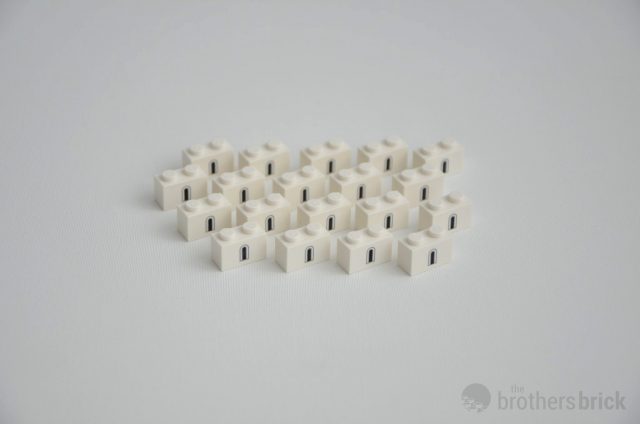
The 1×2 printed bricks
We get two different types of 1×2 bricks with a window: one with a single window (19x 6544472) and one with three next to each other (36x 6544478).
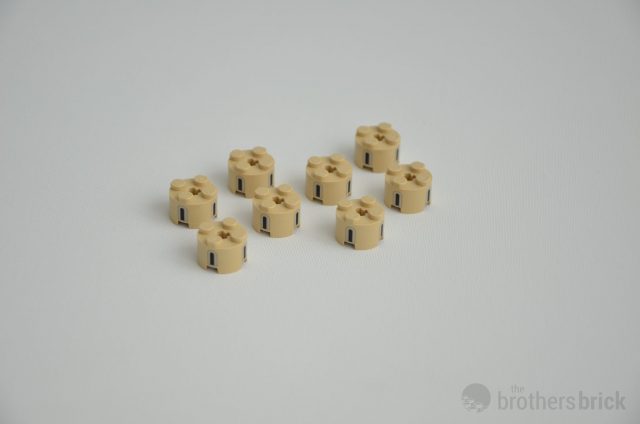
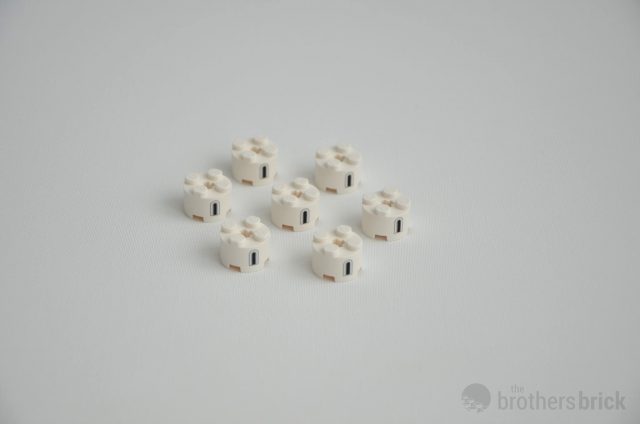
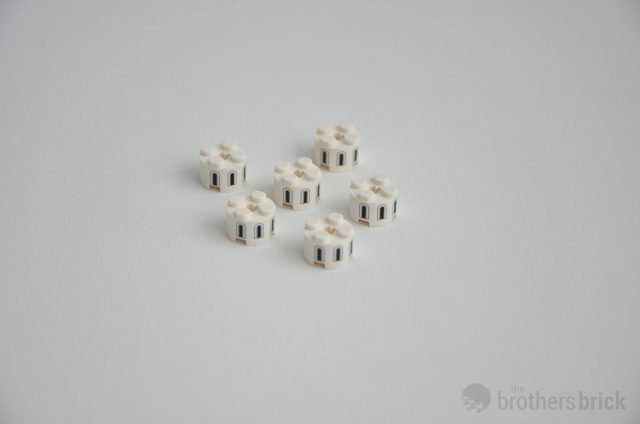
The 2×2 decorated round bricks
Used in the castle for the various round towers, there are 3 types of decorated round bricks. The decoration is only on one side of a 1×2 surface. We get a white triple window one (6x 6544470), a white single window (7x 6544476), and a tan one with two spaced out windows (8x 6544471).
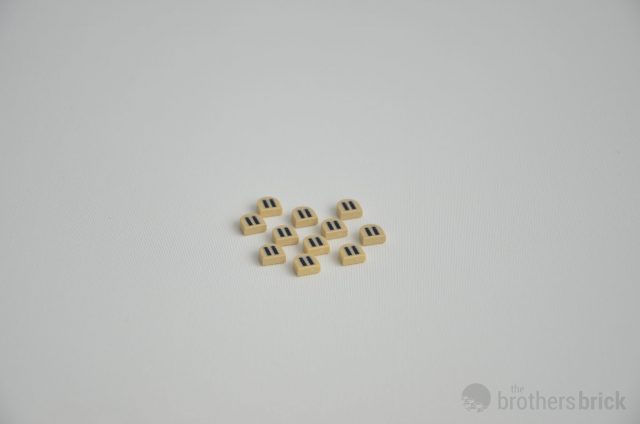
The 1×1 decorated tiles
Finally, of the 1×1 half circle round tiles, 3 printed variations are supplied. There’s a single window darked (16x 6544475) and a double window in tan (10x 6544474). The white 1×1 tile (654473) wins the prize for most included printed part in this set, a total of 134 are used in the build (all attached to a white headlight brick, of which even more are included – 149 to be precise).

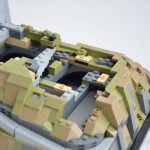
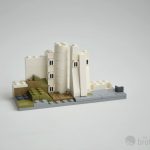
Construction of the castle
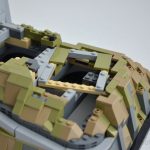
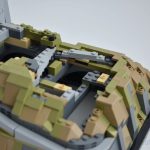
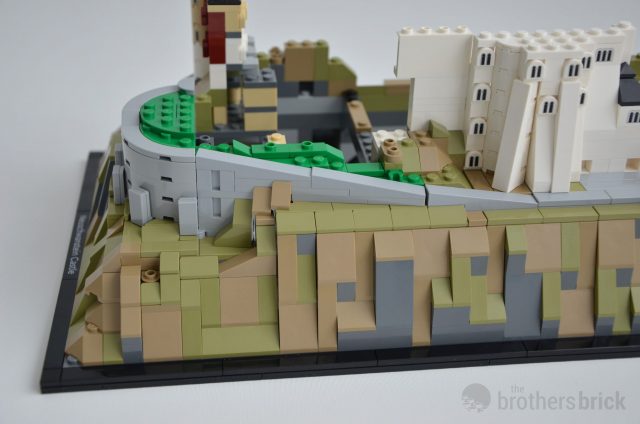
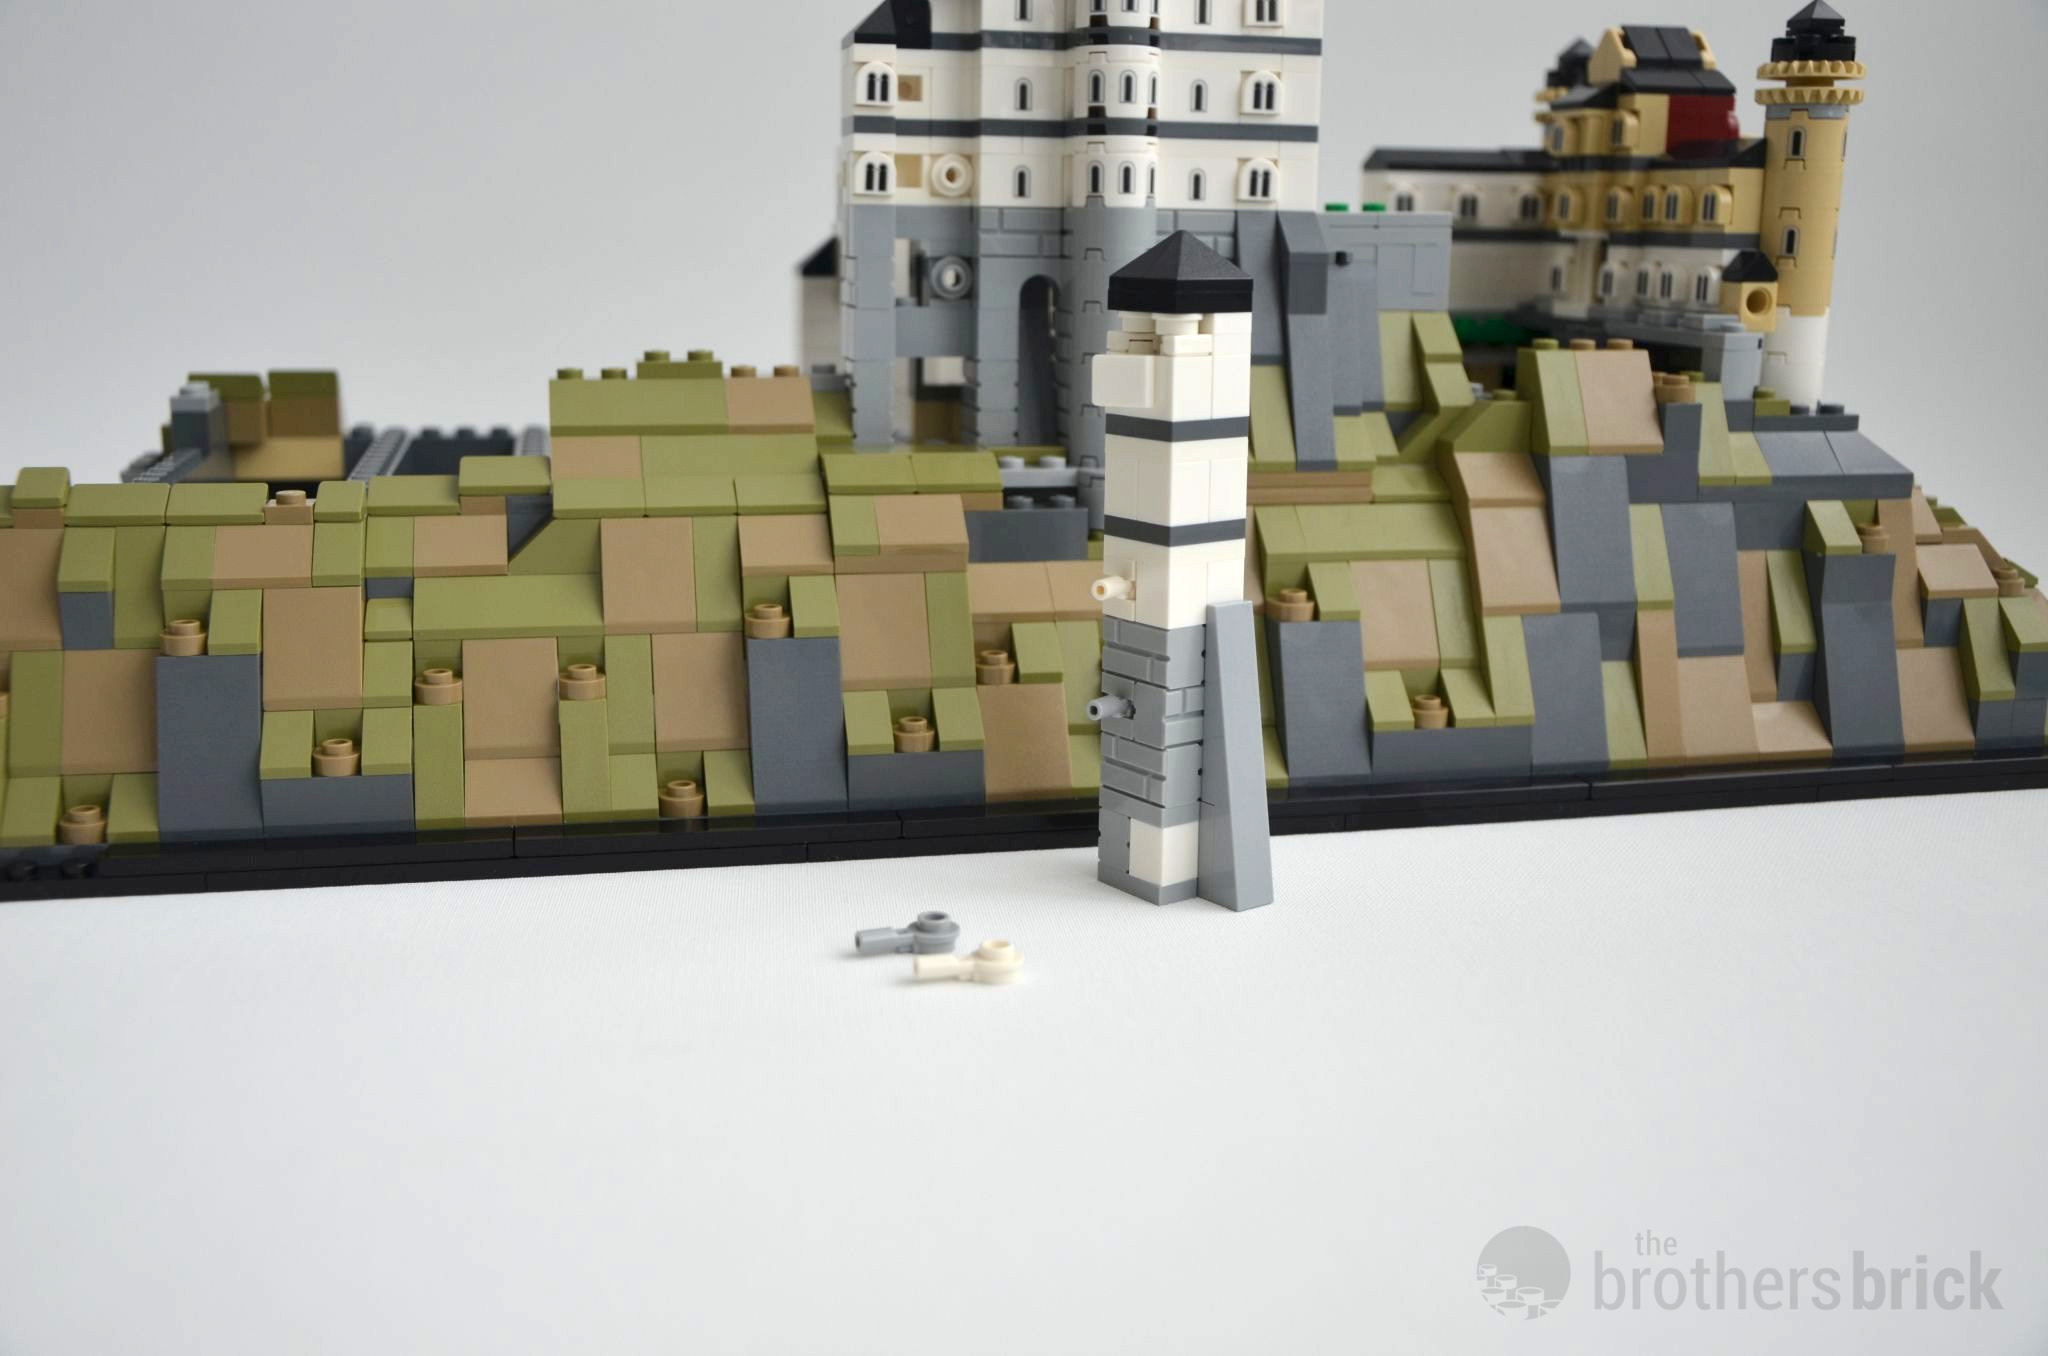
What is a castle without a base? Well, we’re building that first, but as it isn’t the most interesting part of the build, I’ll keep this section brief. The rocky foundation is mostly hollow with some long bricks for us to affix the castle modules to. Rather than build the entire foundation first, the build breaks it up as we go from the front to back of the castle.
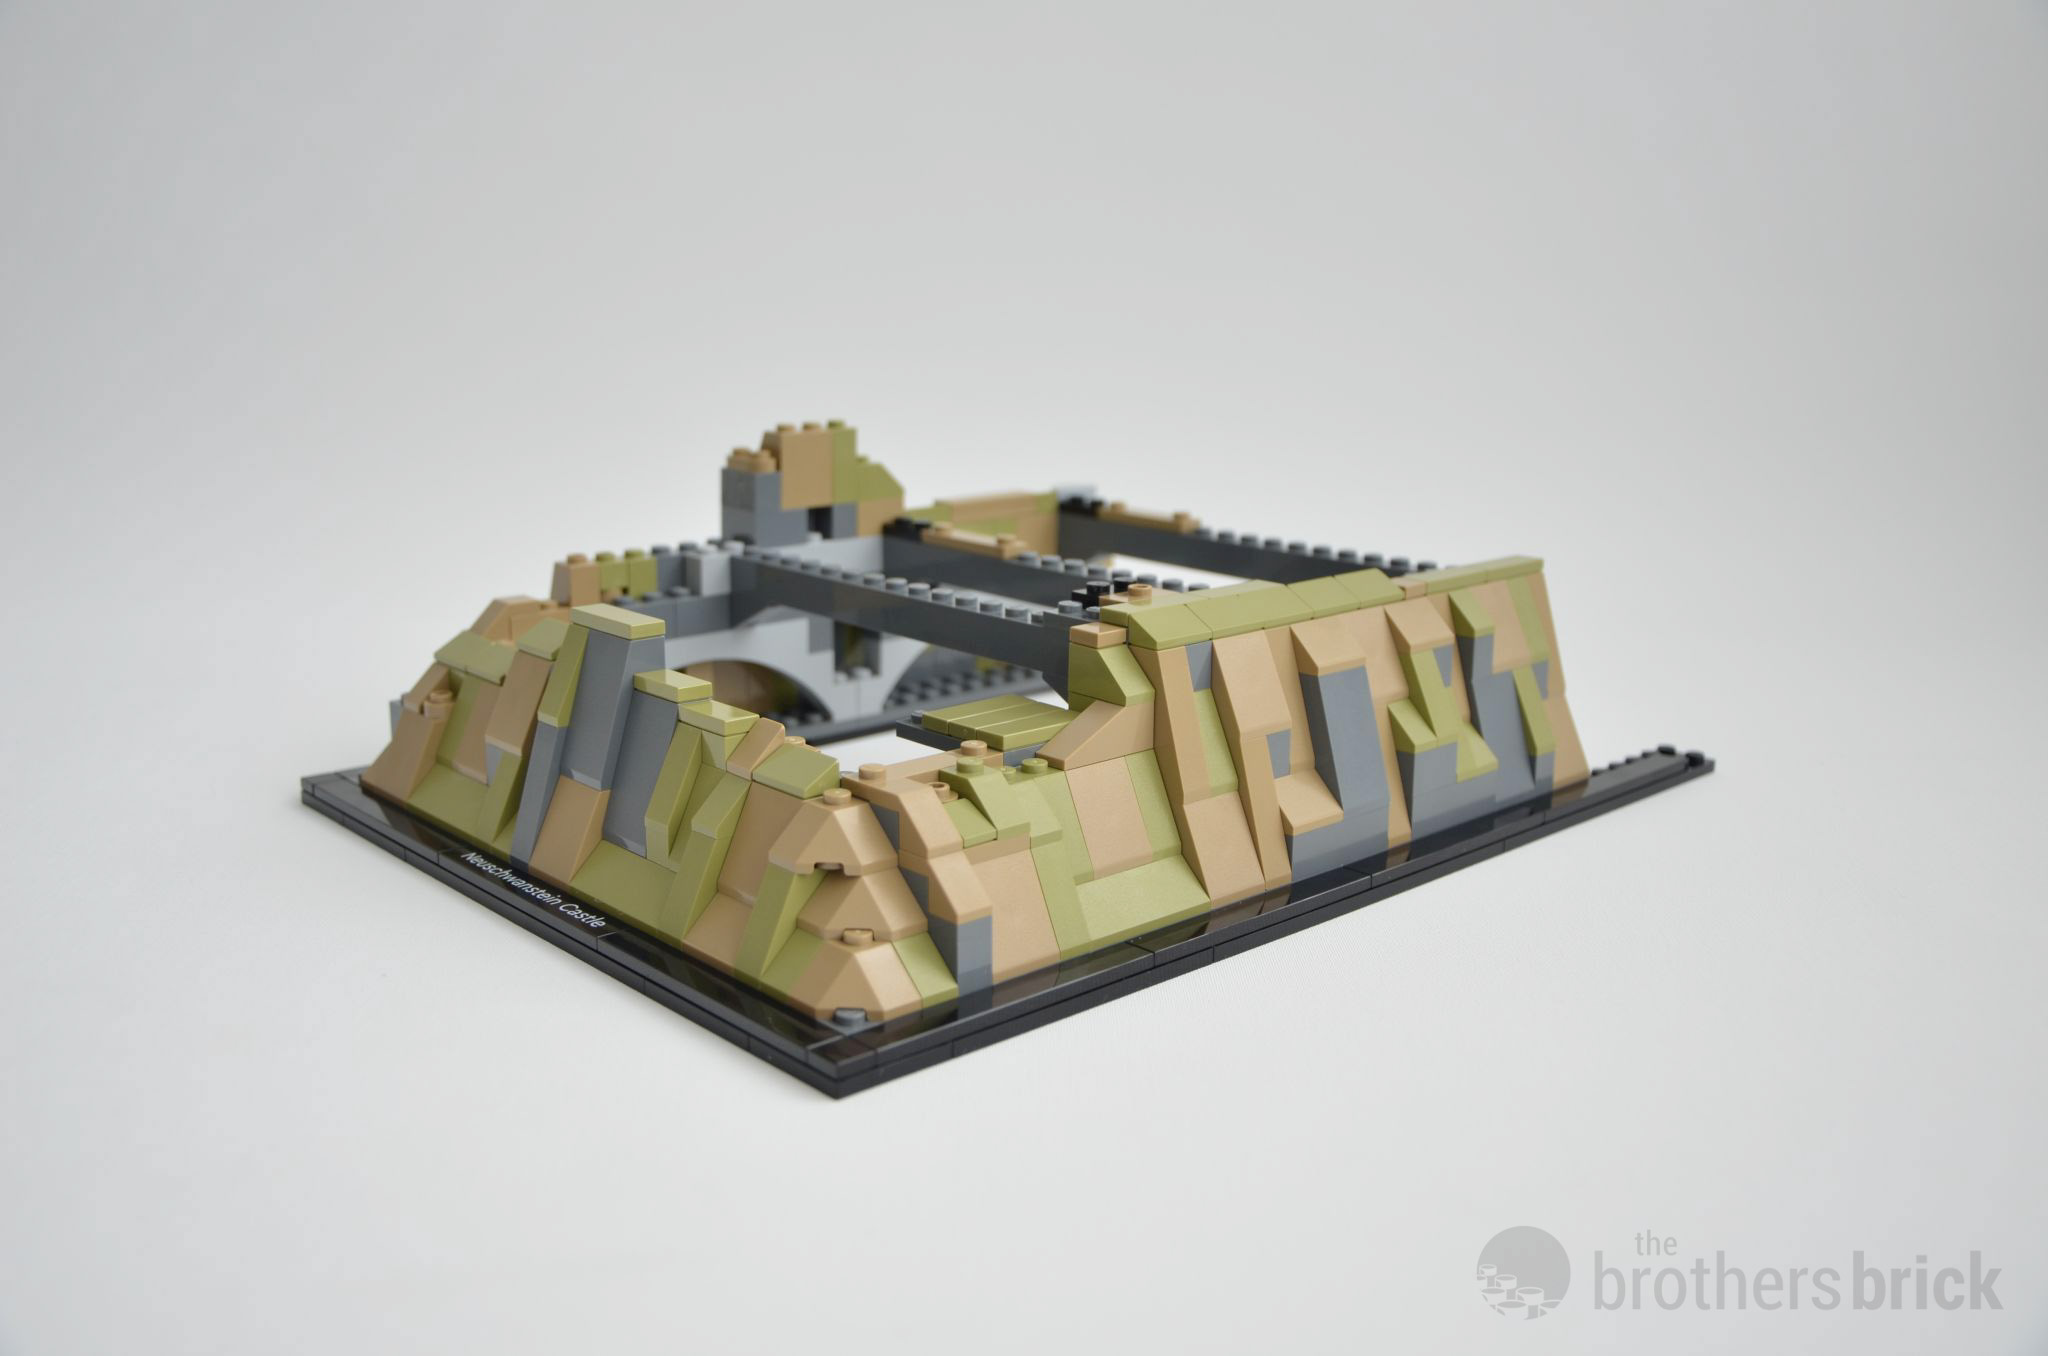
The microscale building begins in earnest with the the castle entrance. Brackets and 2 x 2 triangular tiles add some welcome detail to the 4×4 round corner pieces at the bottom of the foundation.
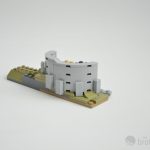
After adding the previous sub build to the base, the first tower of the gatehouse is constructed.
The base is extended and a first part of the road to the castle is added. Much of the castle is built as sub-assemblies, only added to the base after they are finished.
As we build more of the castle, a mix of techniques are used to capture the ornate Romanesque style. New slopes are used for the wall with some simple SNOT connections. For the part that needed to be angled, the D-Snot (Brick, Round 1 x 1 x 2/3 Half Circle Extended with Stud on Side) piece is used to attach the slope piece.
The road to the main gate is cleverly angled with one hinge plate and a jumper tile, which is fitted against a wedge plate.
Next we take a look at the construction of the gate house, and especially the roof. The DSnot pieces, together with the wedge tiles gives the same angle as the roof piece.
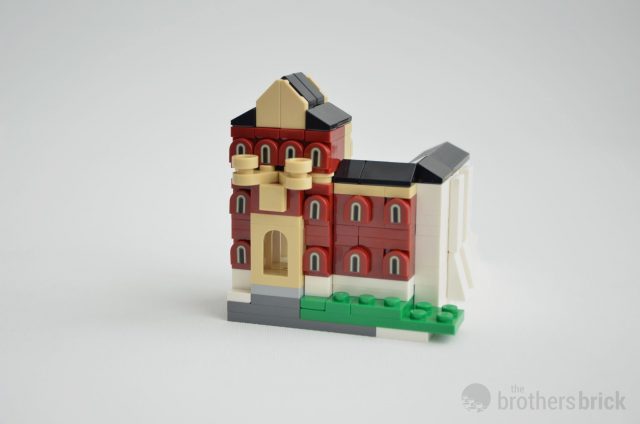
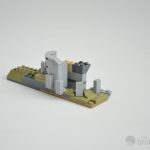
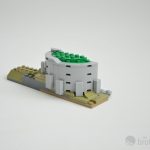
Moving along to the Palas proper, we encounter some new techniques. The bar hole of a headlight brick with 1×1 round plate with hole is used together with a 1 x 1 Round Plate with Hollow Stud in the tower, to attach a corner of the castle at a subtle angle.
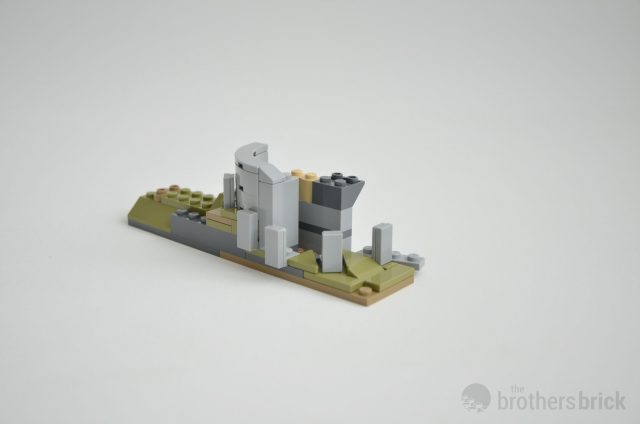
The big square tower is build separately before being placed on the base.
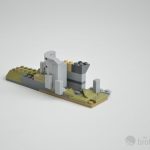
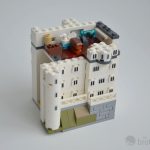
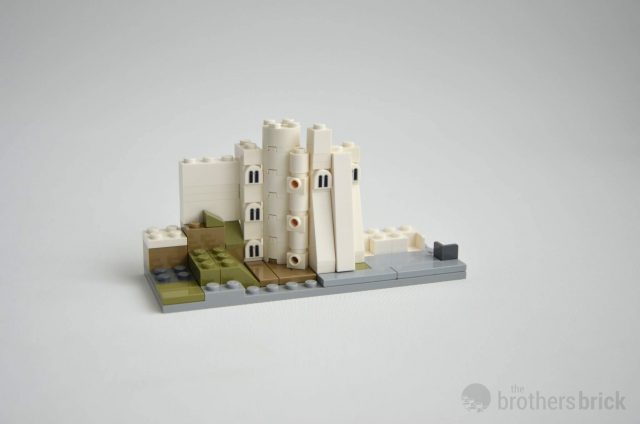
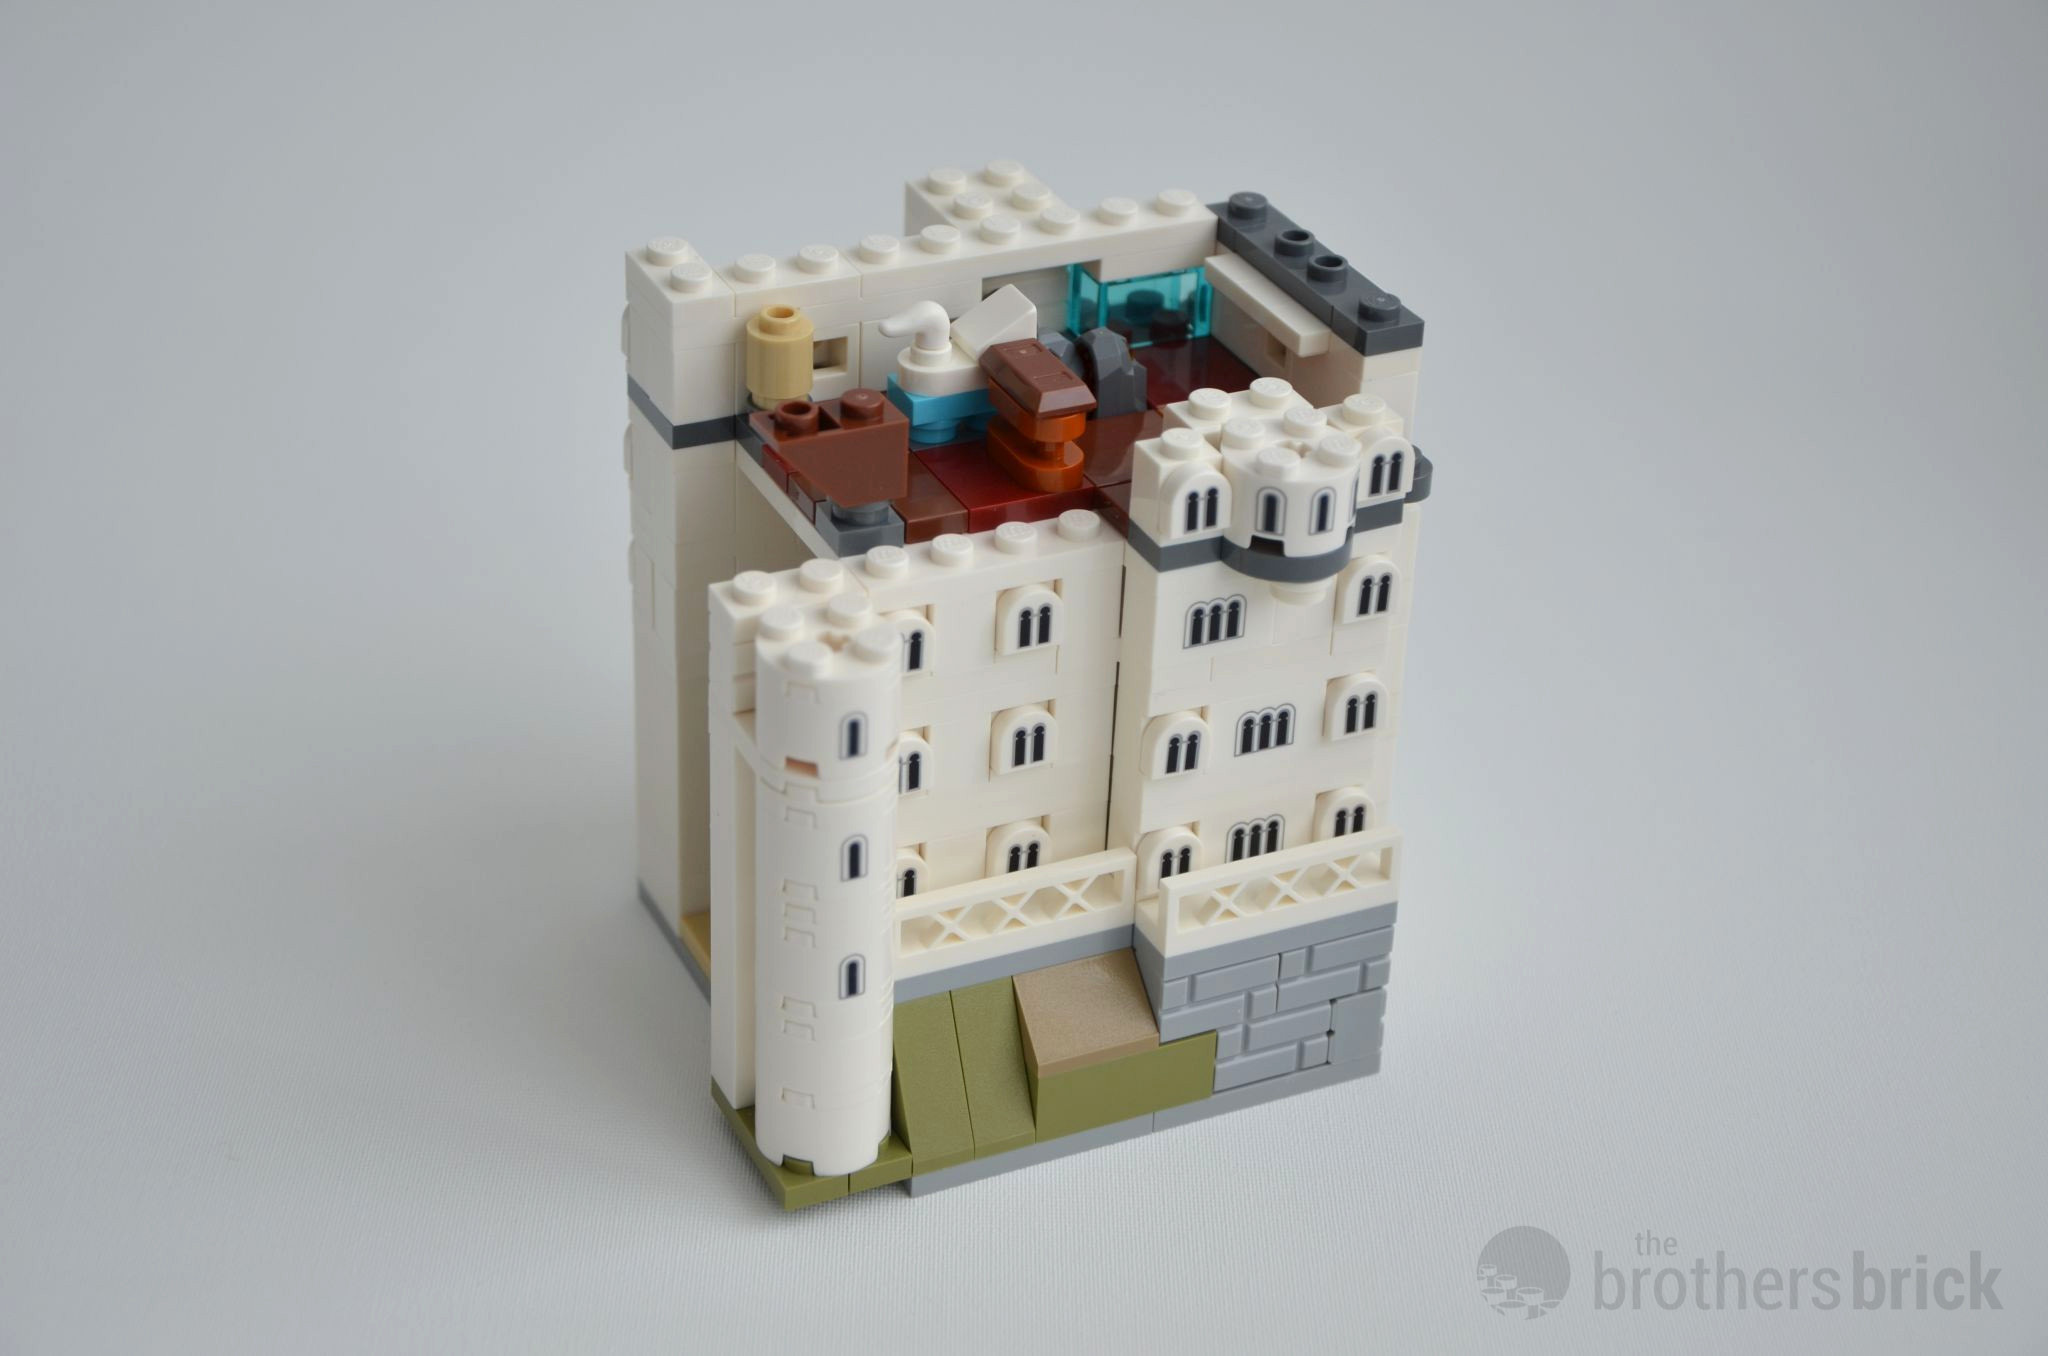
One of the two interiors of the castle is located on this part of the Palas. Here we get a glimpse of the main residence.
This structure gets placed next to the upper courtyard…
But once the roof is added, the interior cannot be seen anymore.
The next section is built off the grid. This is achieved with the use of a hinge plate and jumper on the foundation. Two hinge plates are connected to each other with a plate, then the other plates are connected and secured by the correctly placed jumper plates.
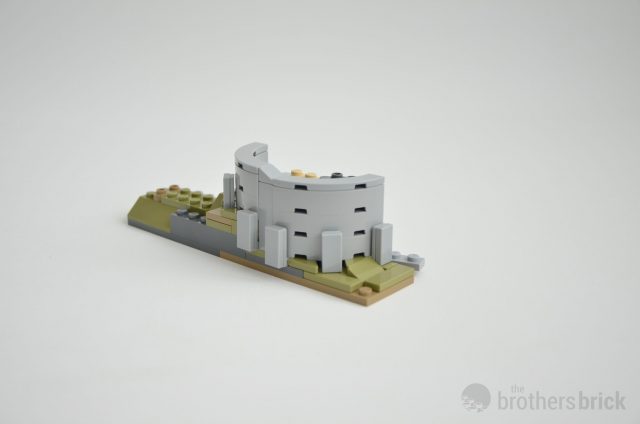
The other interior is the Singer’s Hall, included in the angled section…
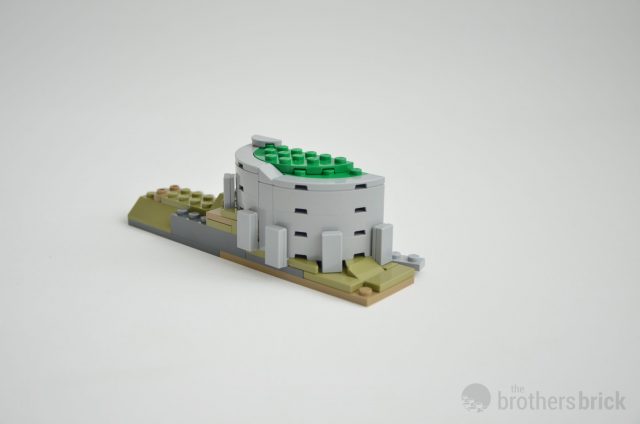
Before it too is closed up by the roof and the final round tower.
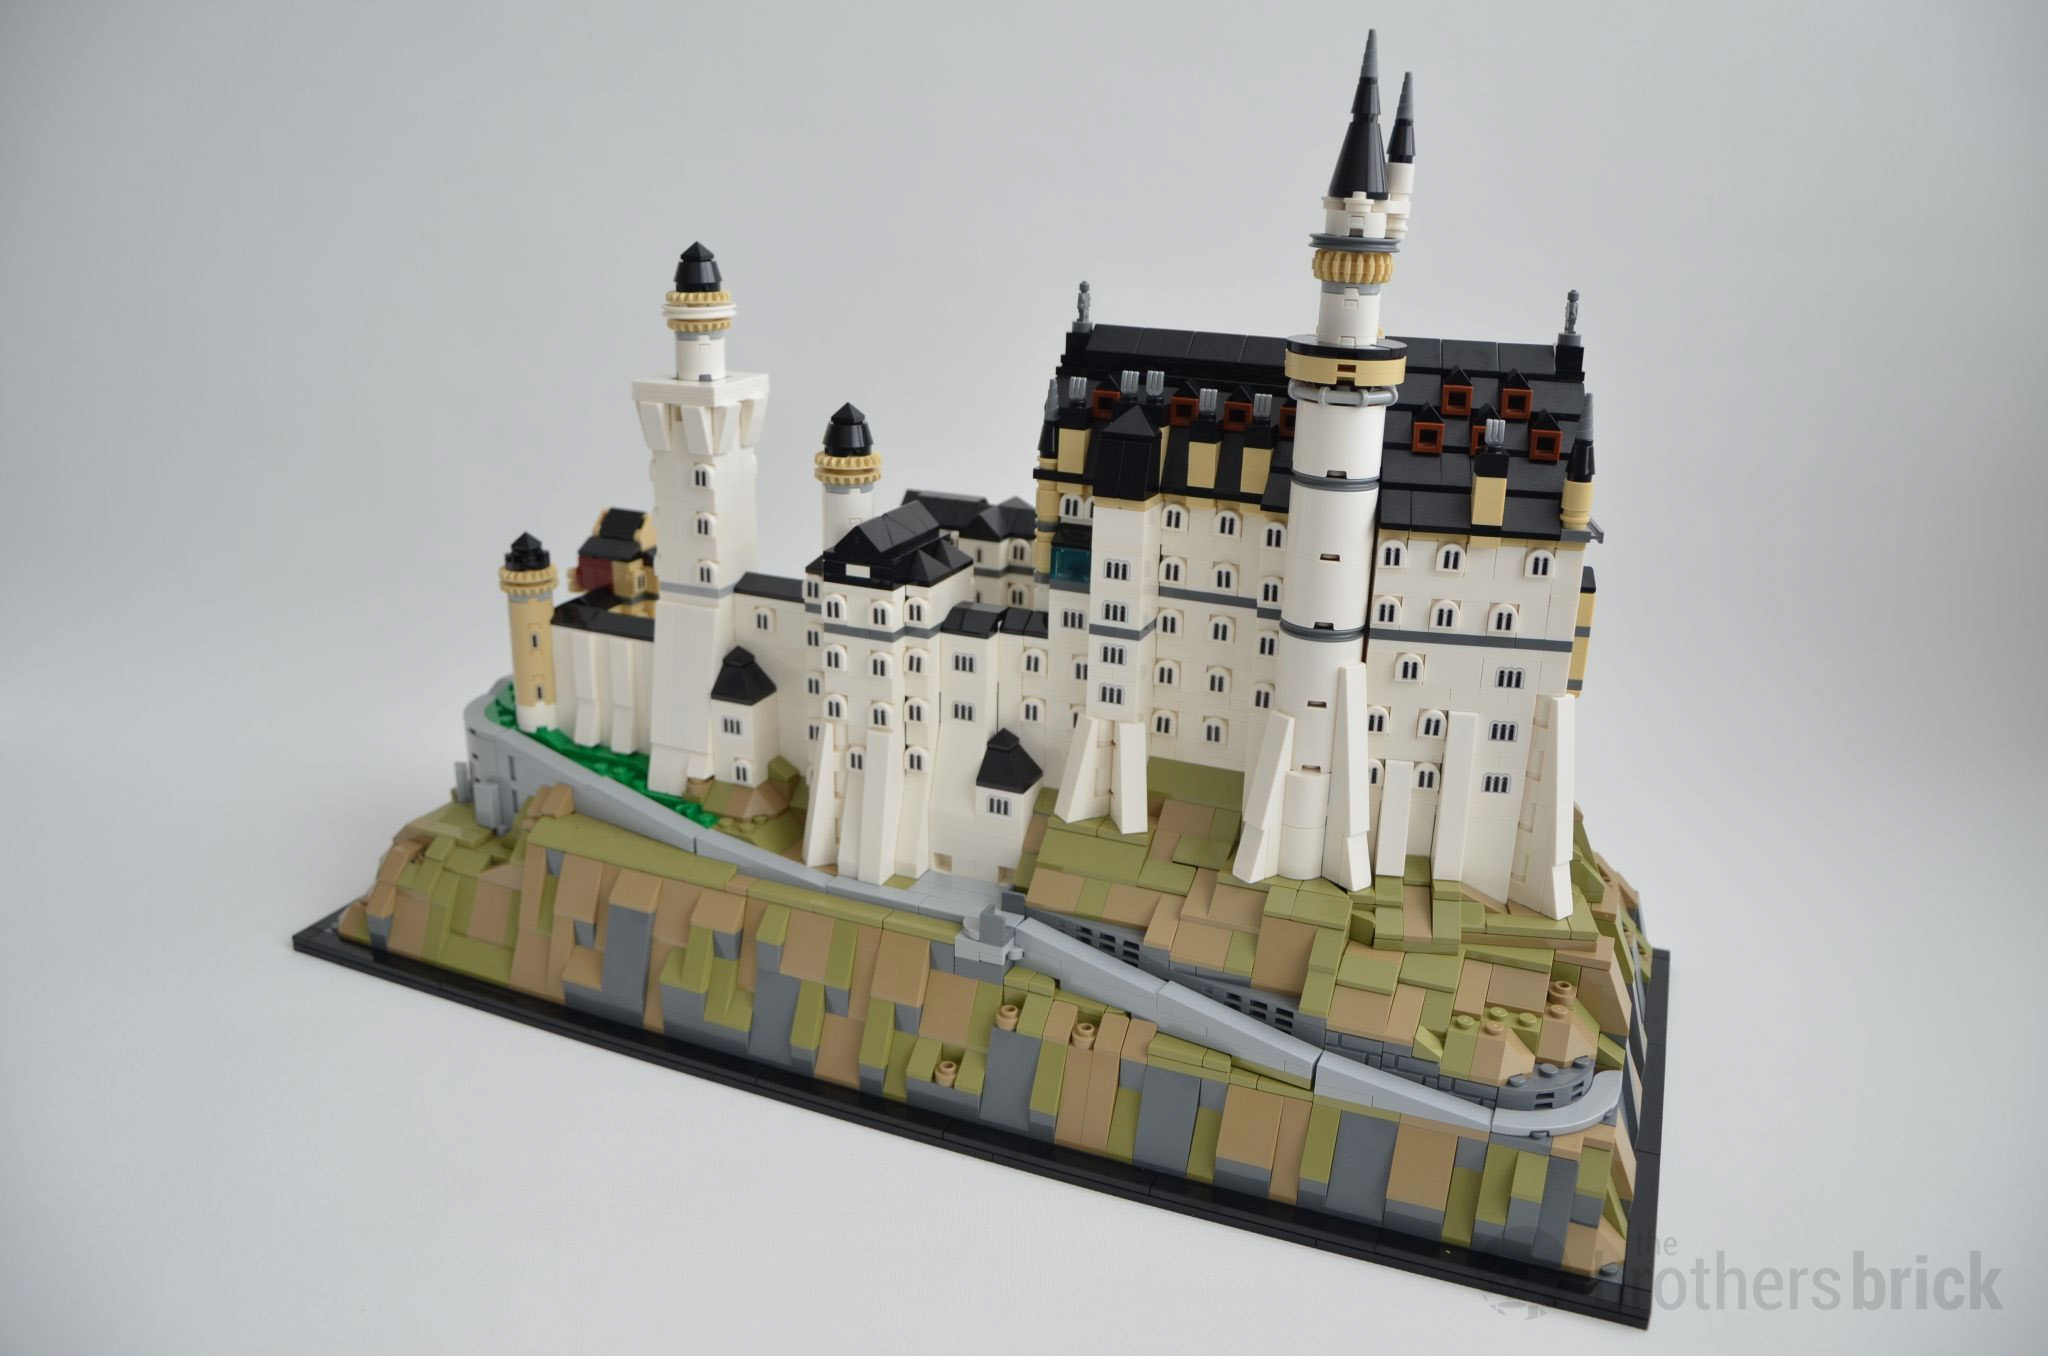
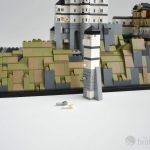
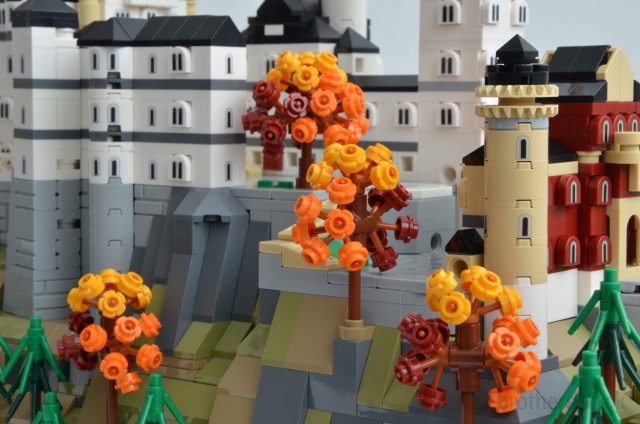
After the large round tower is added, all that remains is adding the trees surrounding the castle.
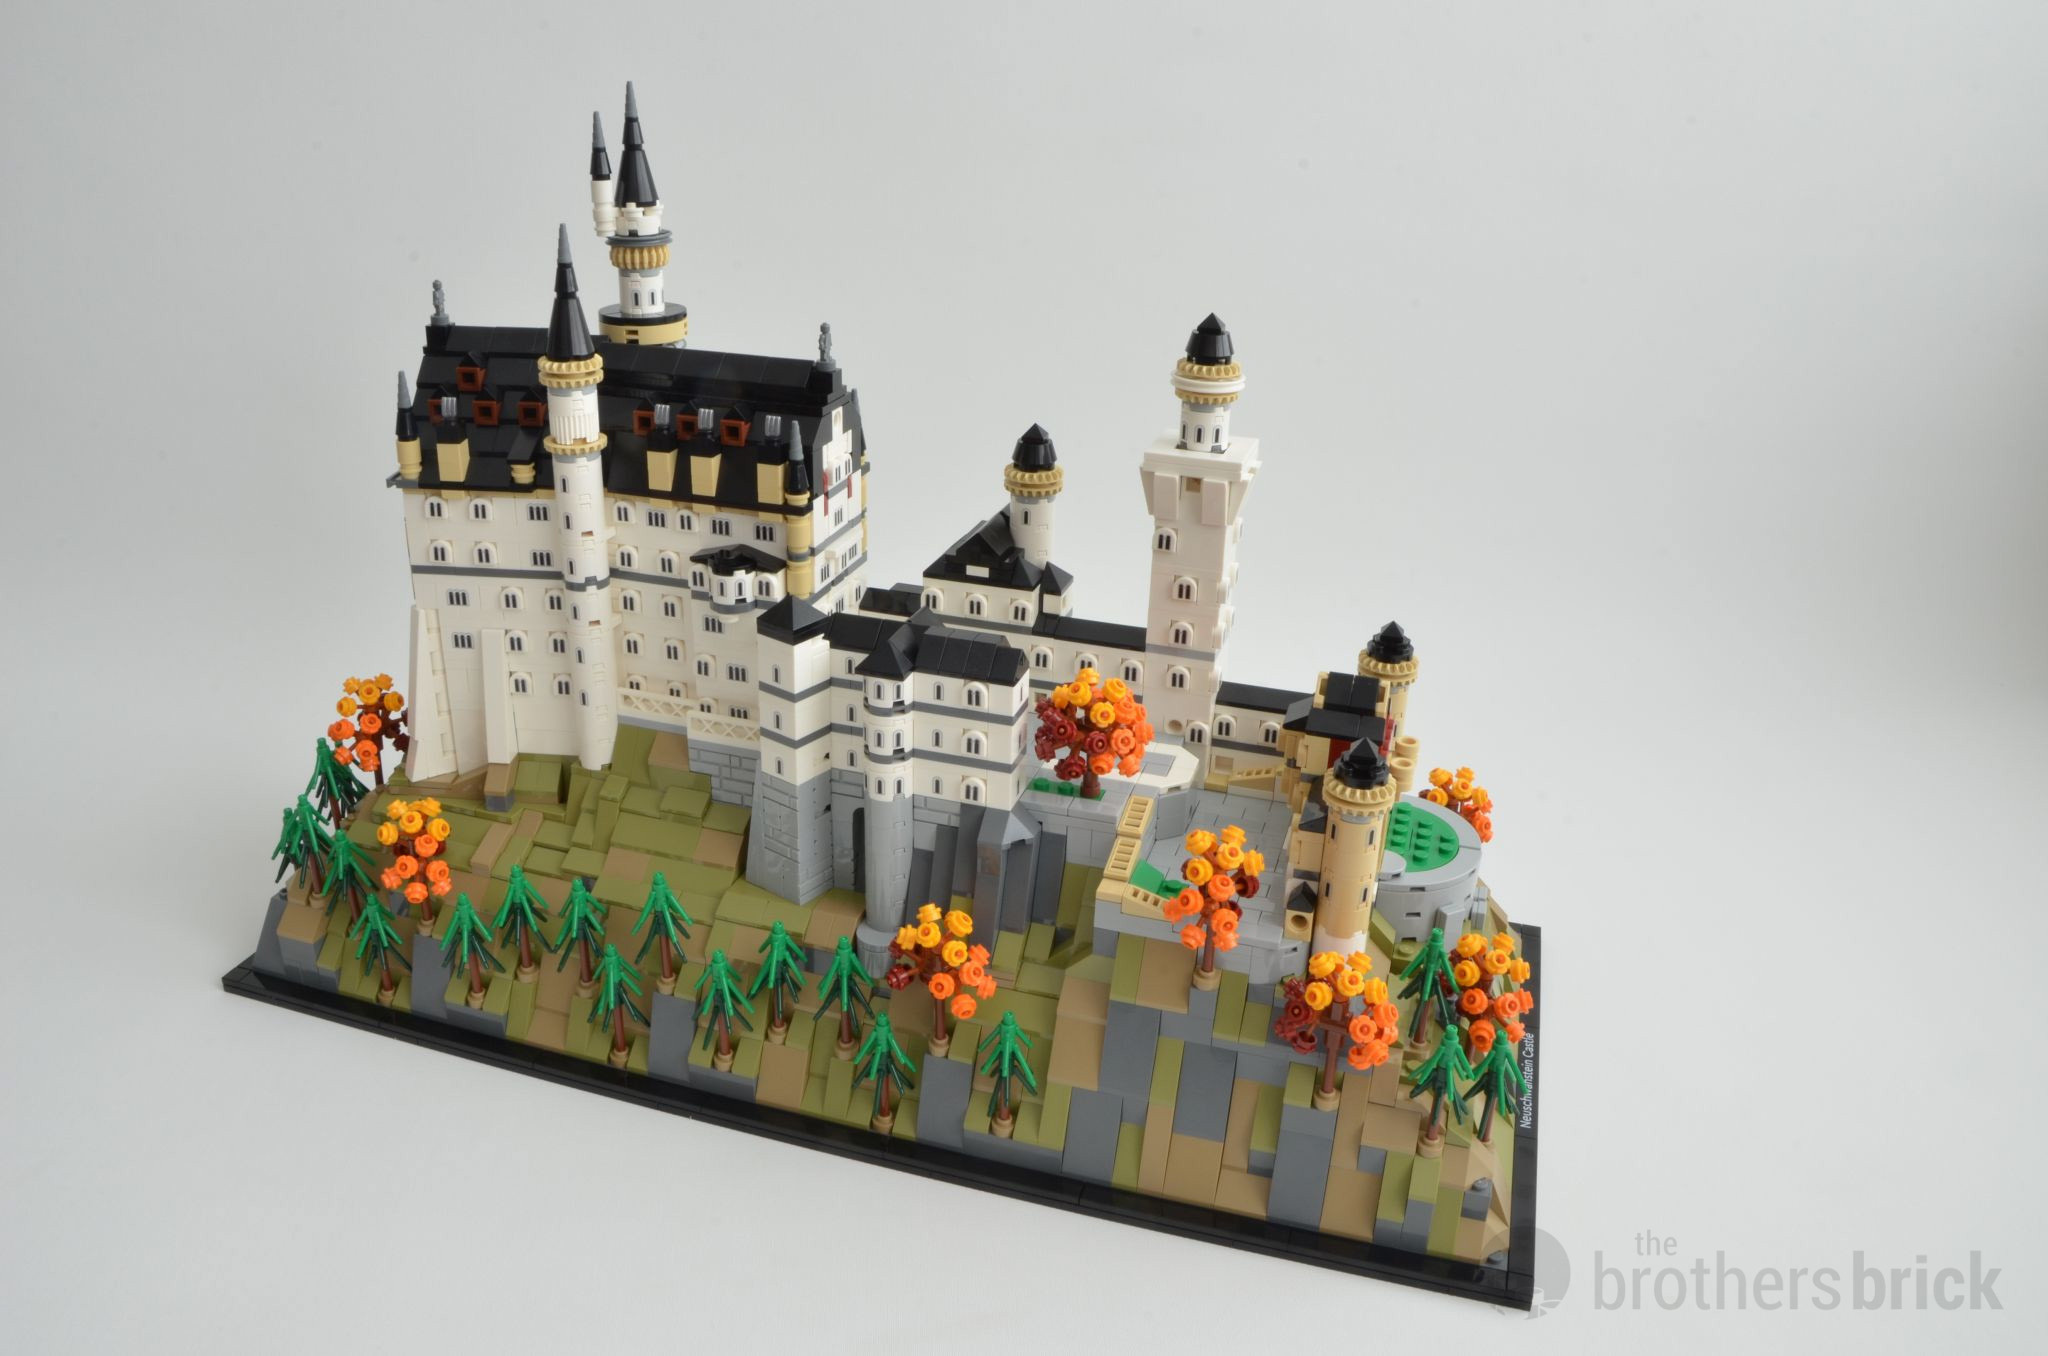
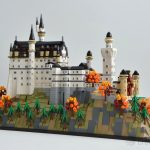
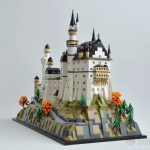
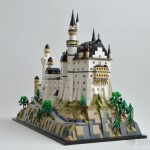
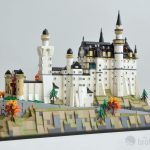
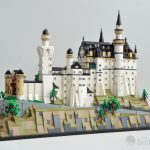
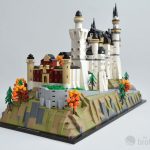
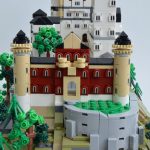
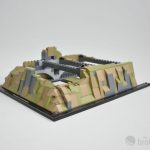
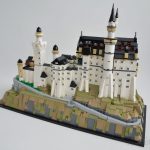
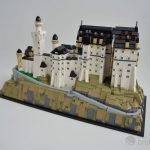
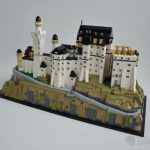
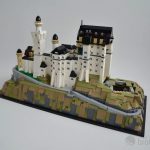
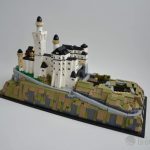
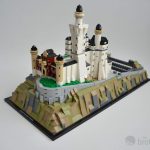
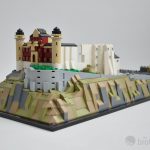
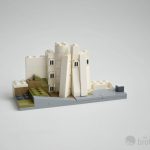
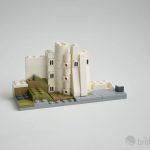
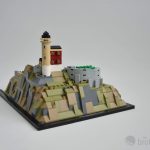
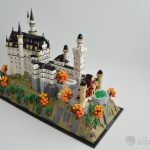
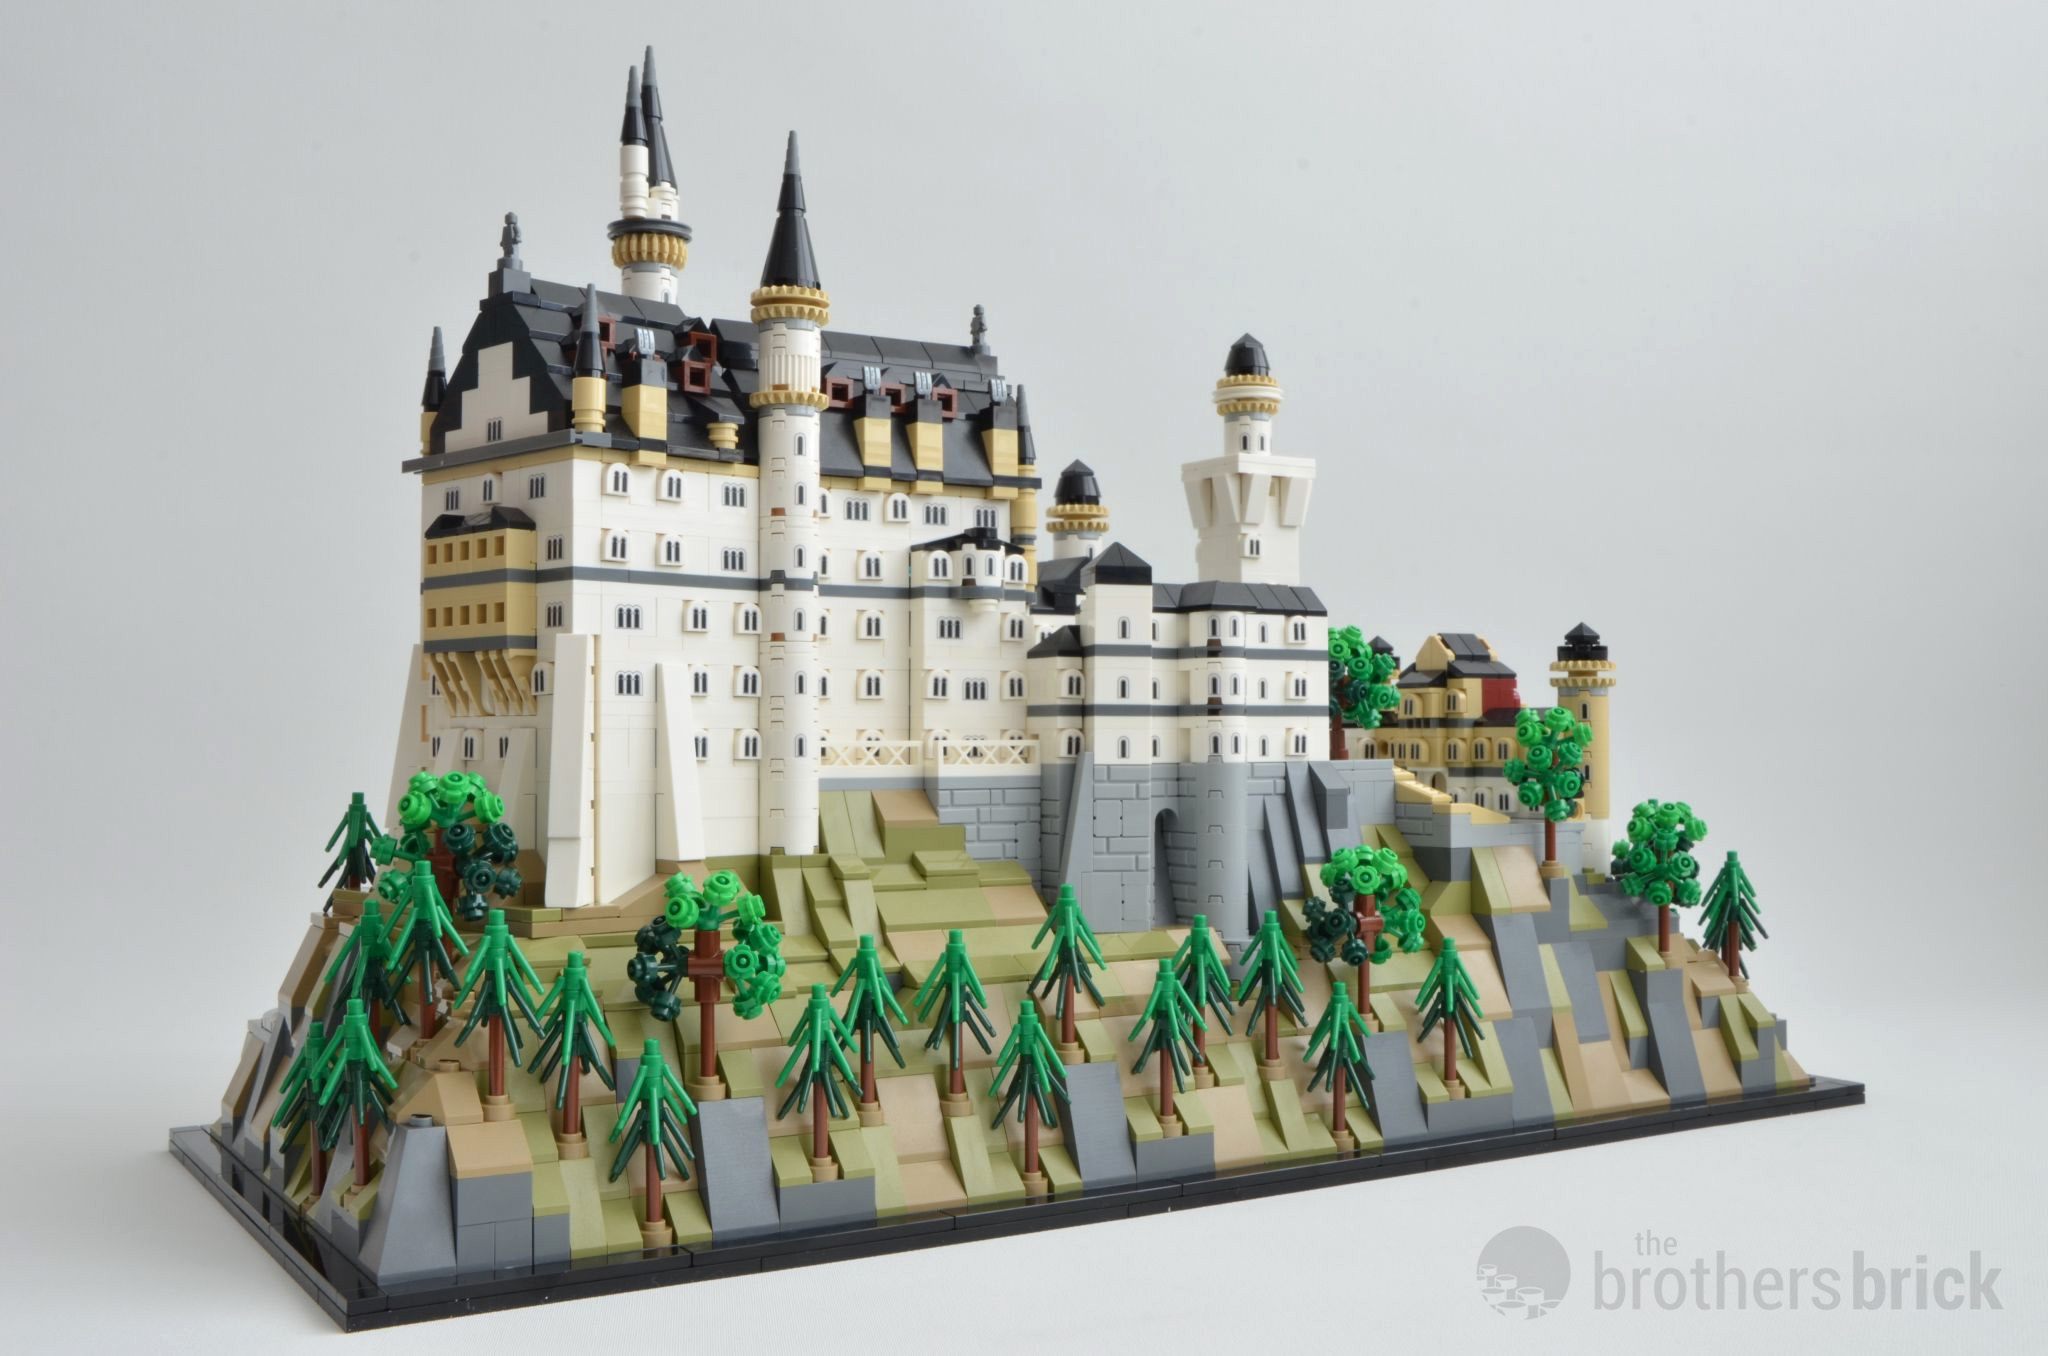
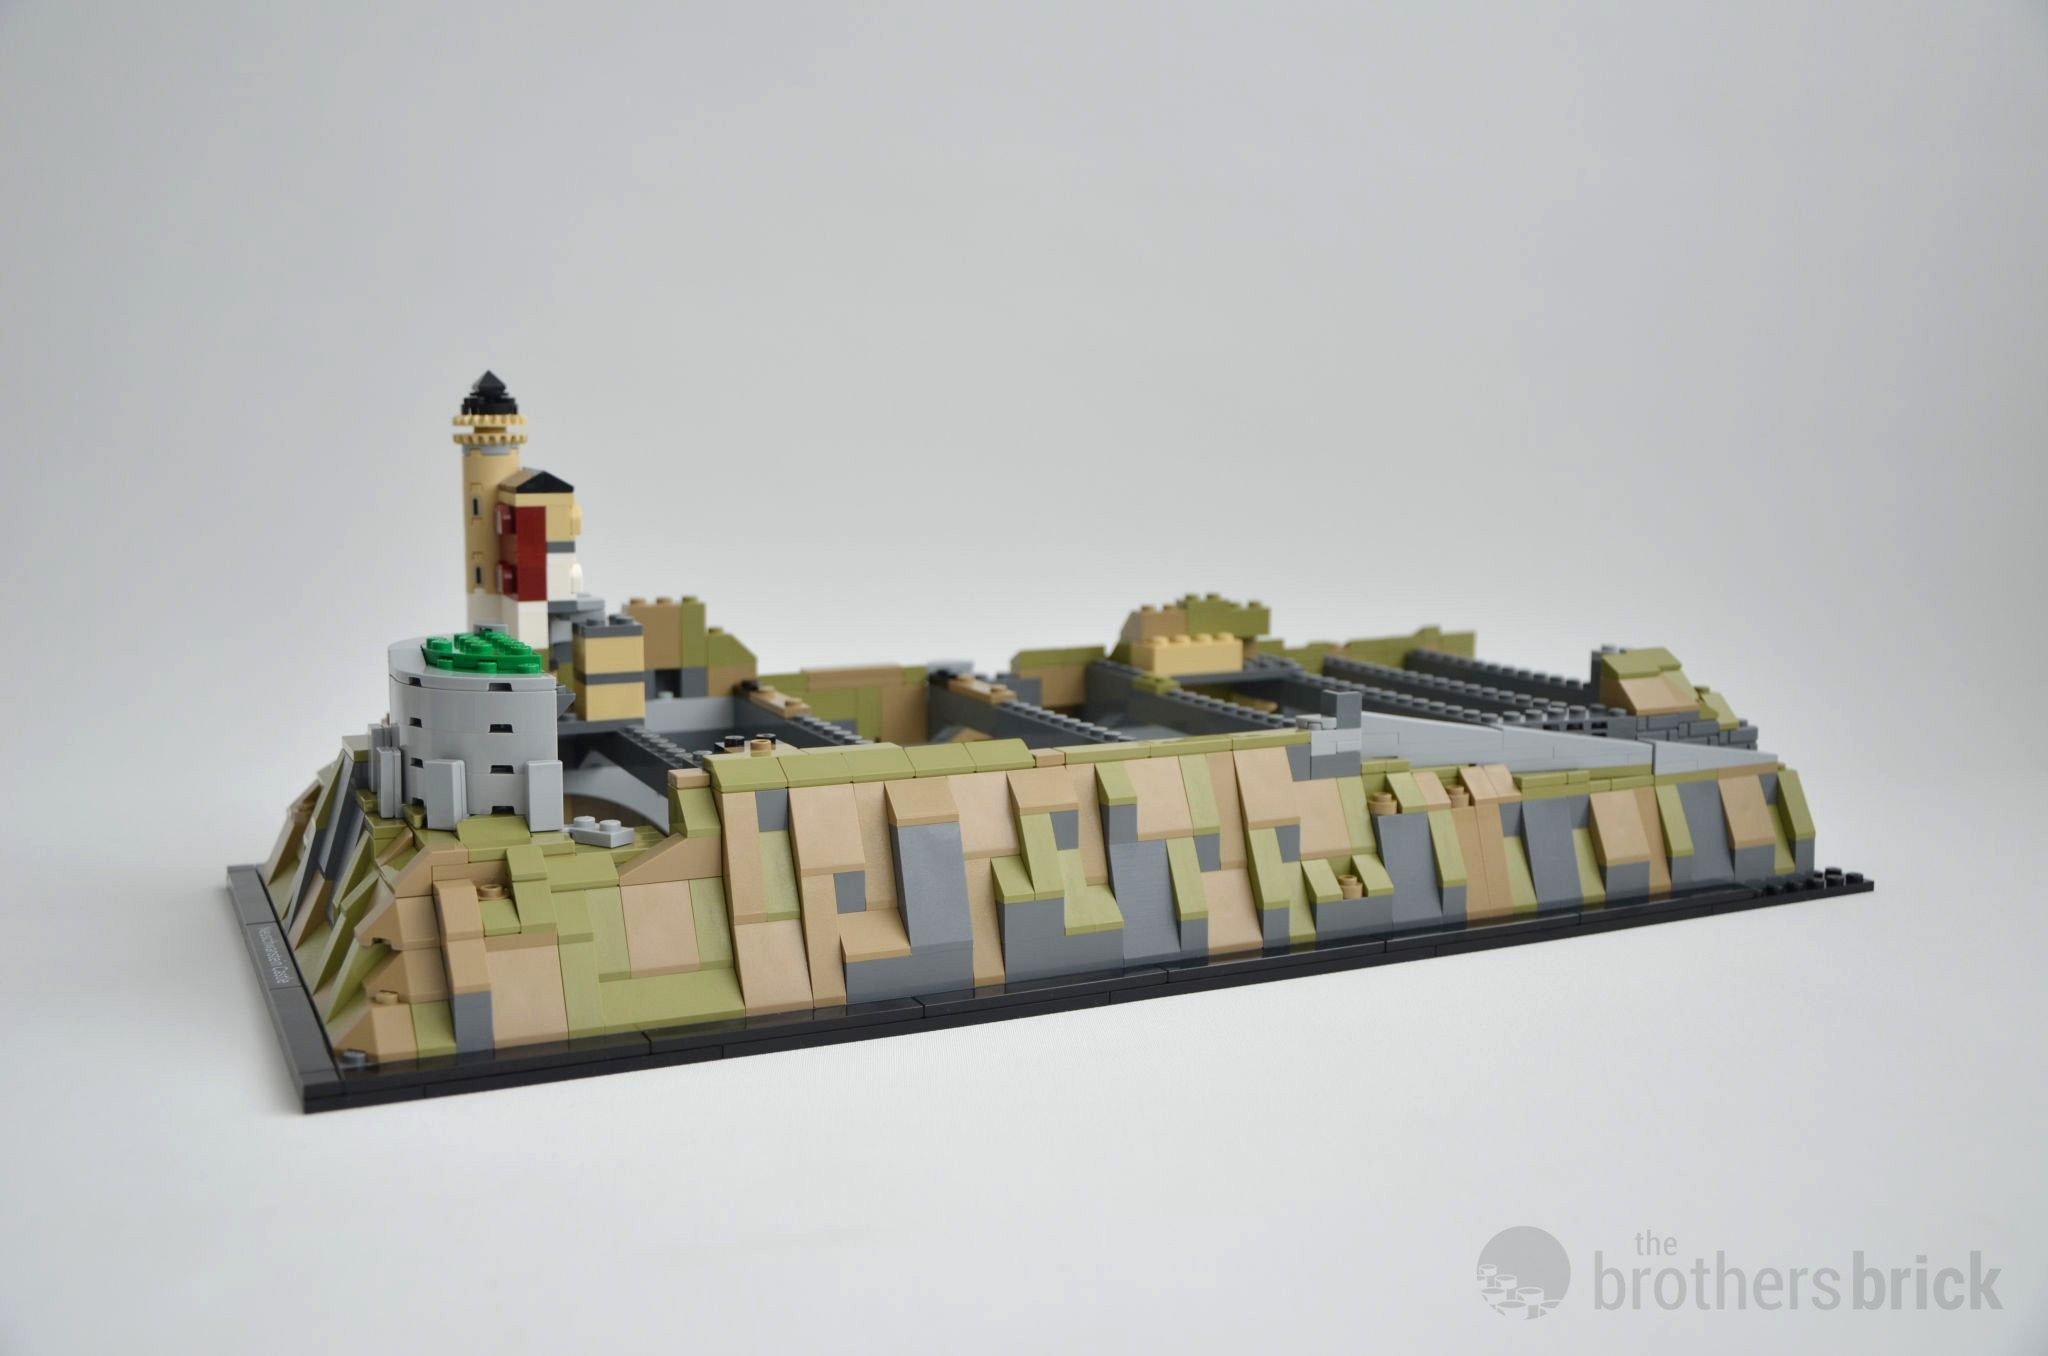
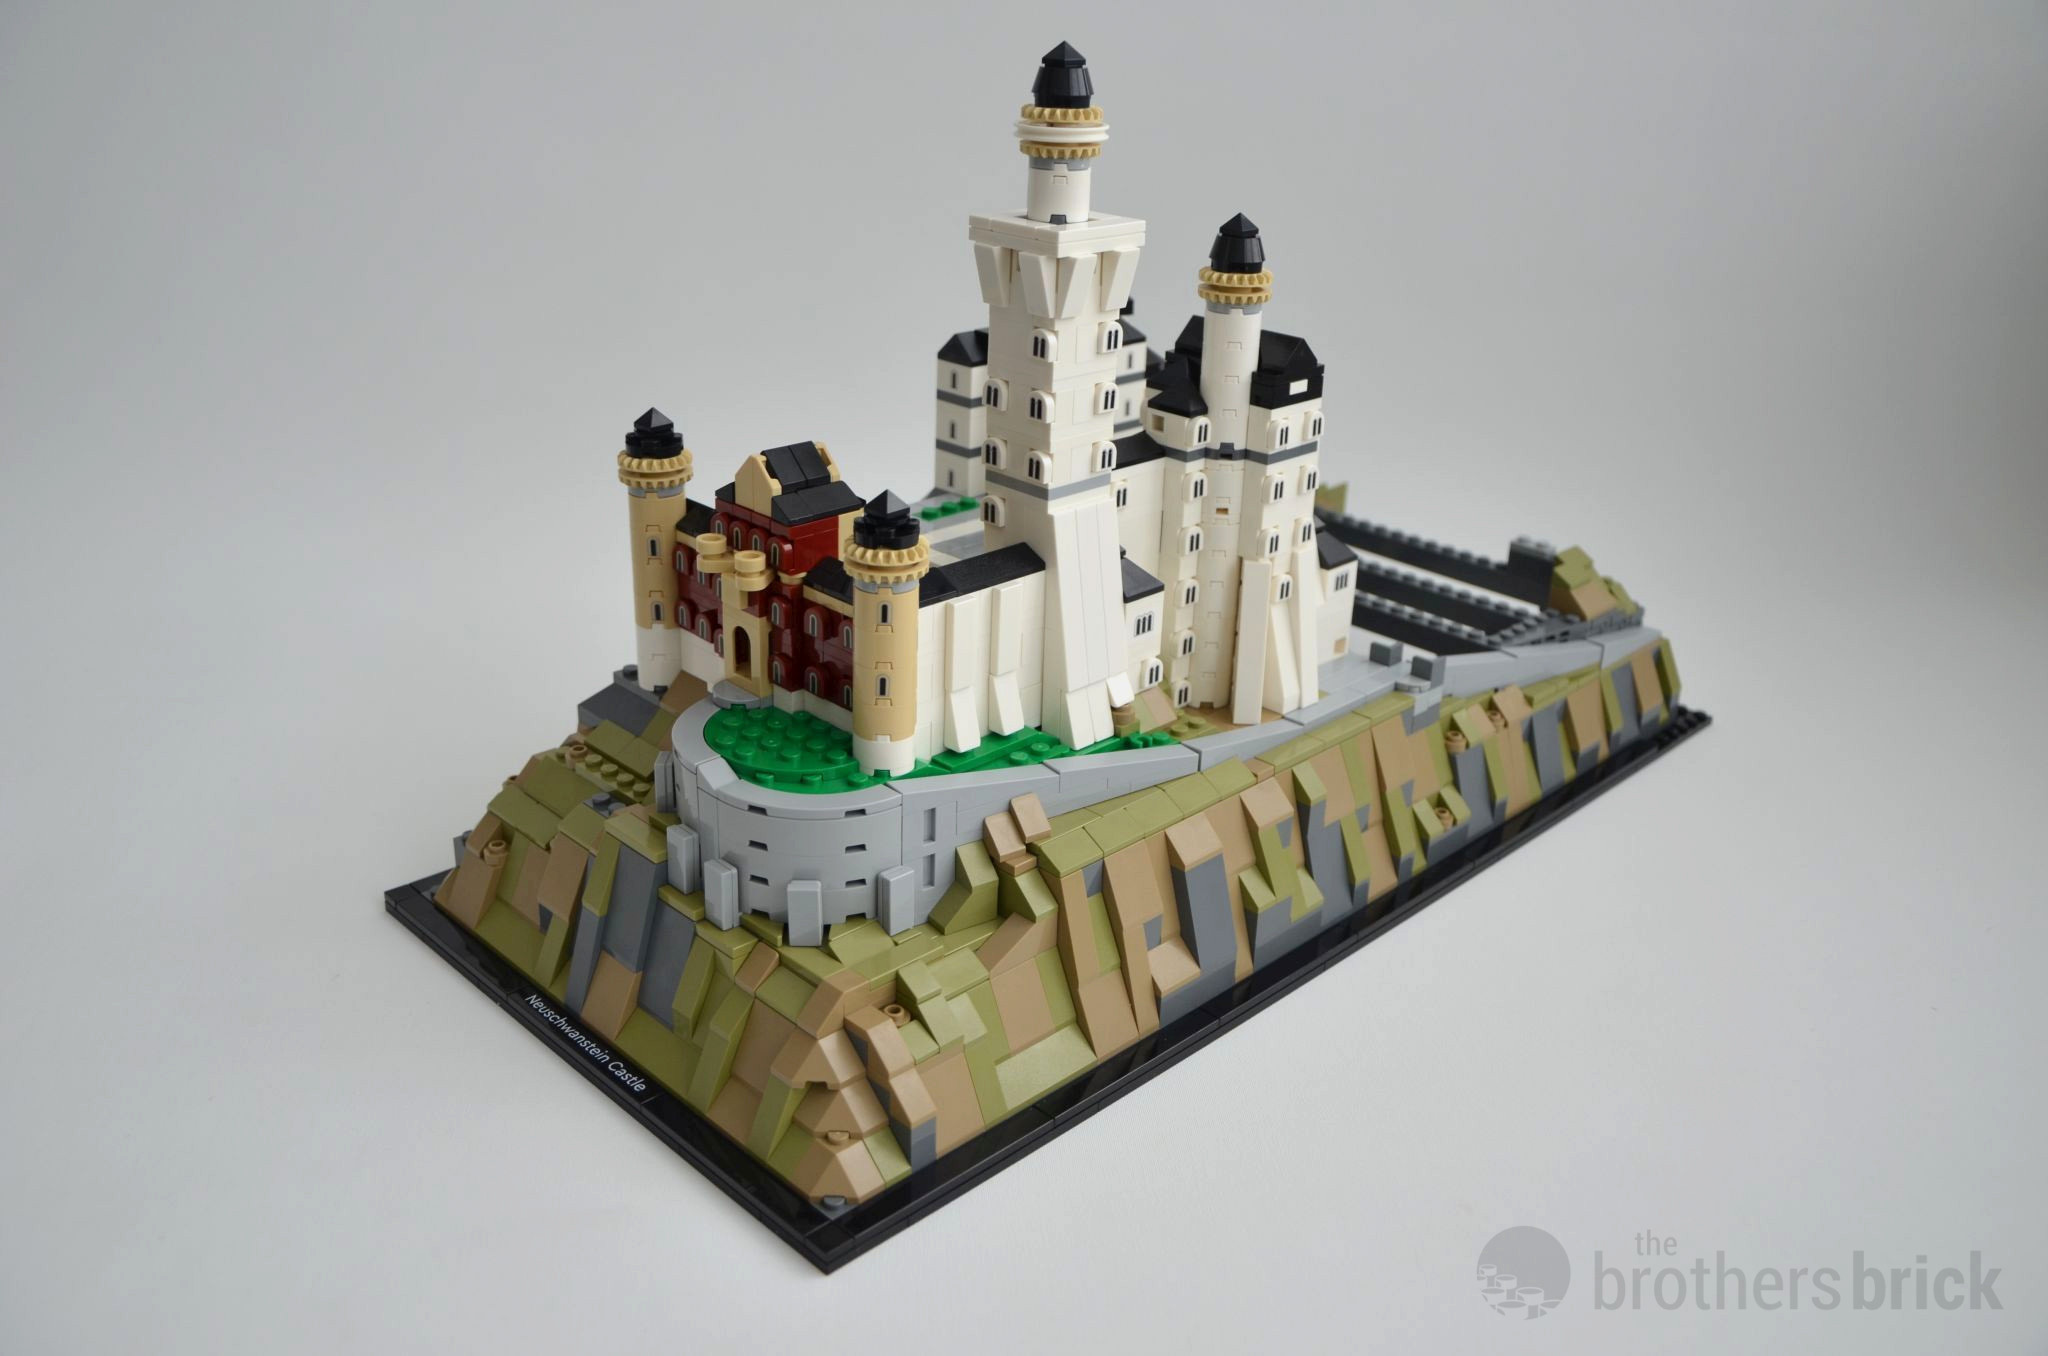
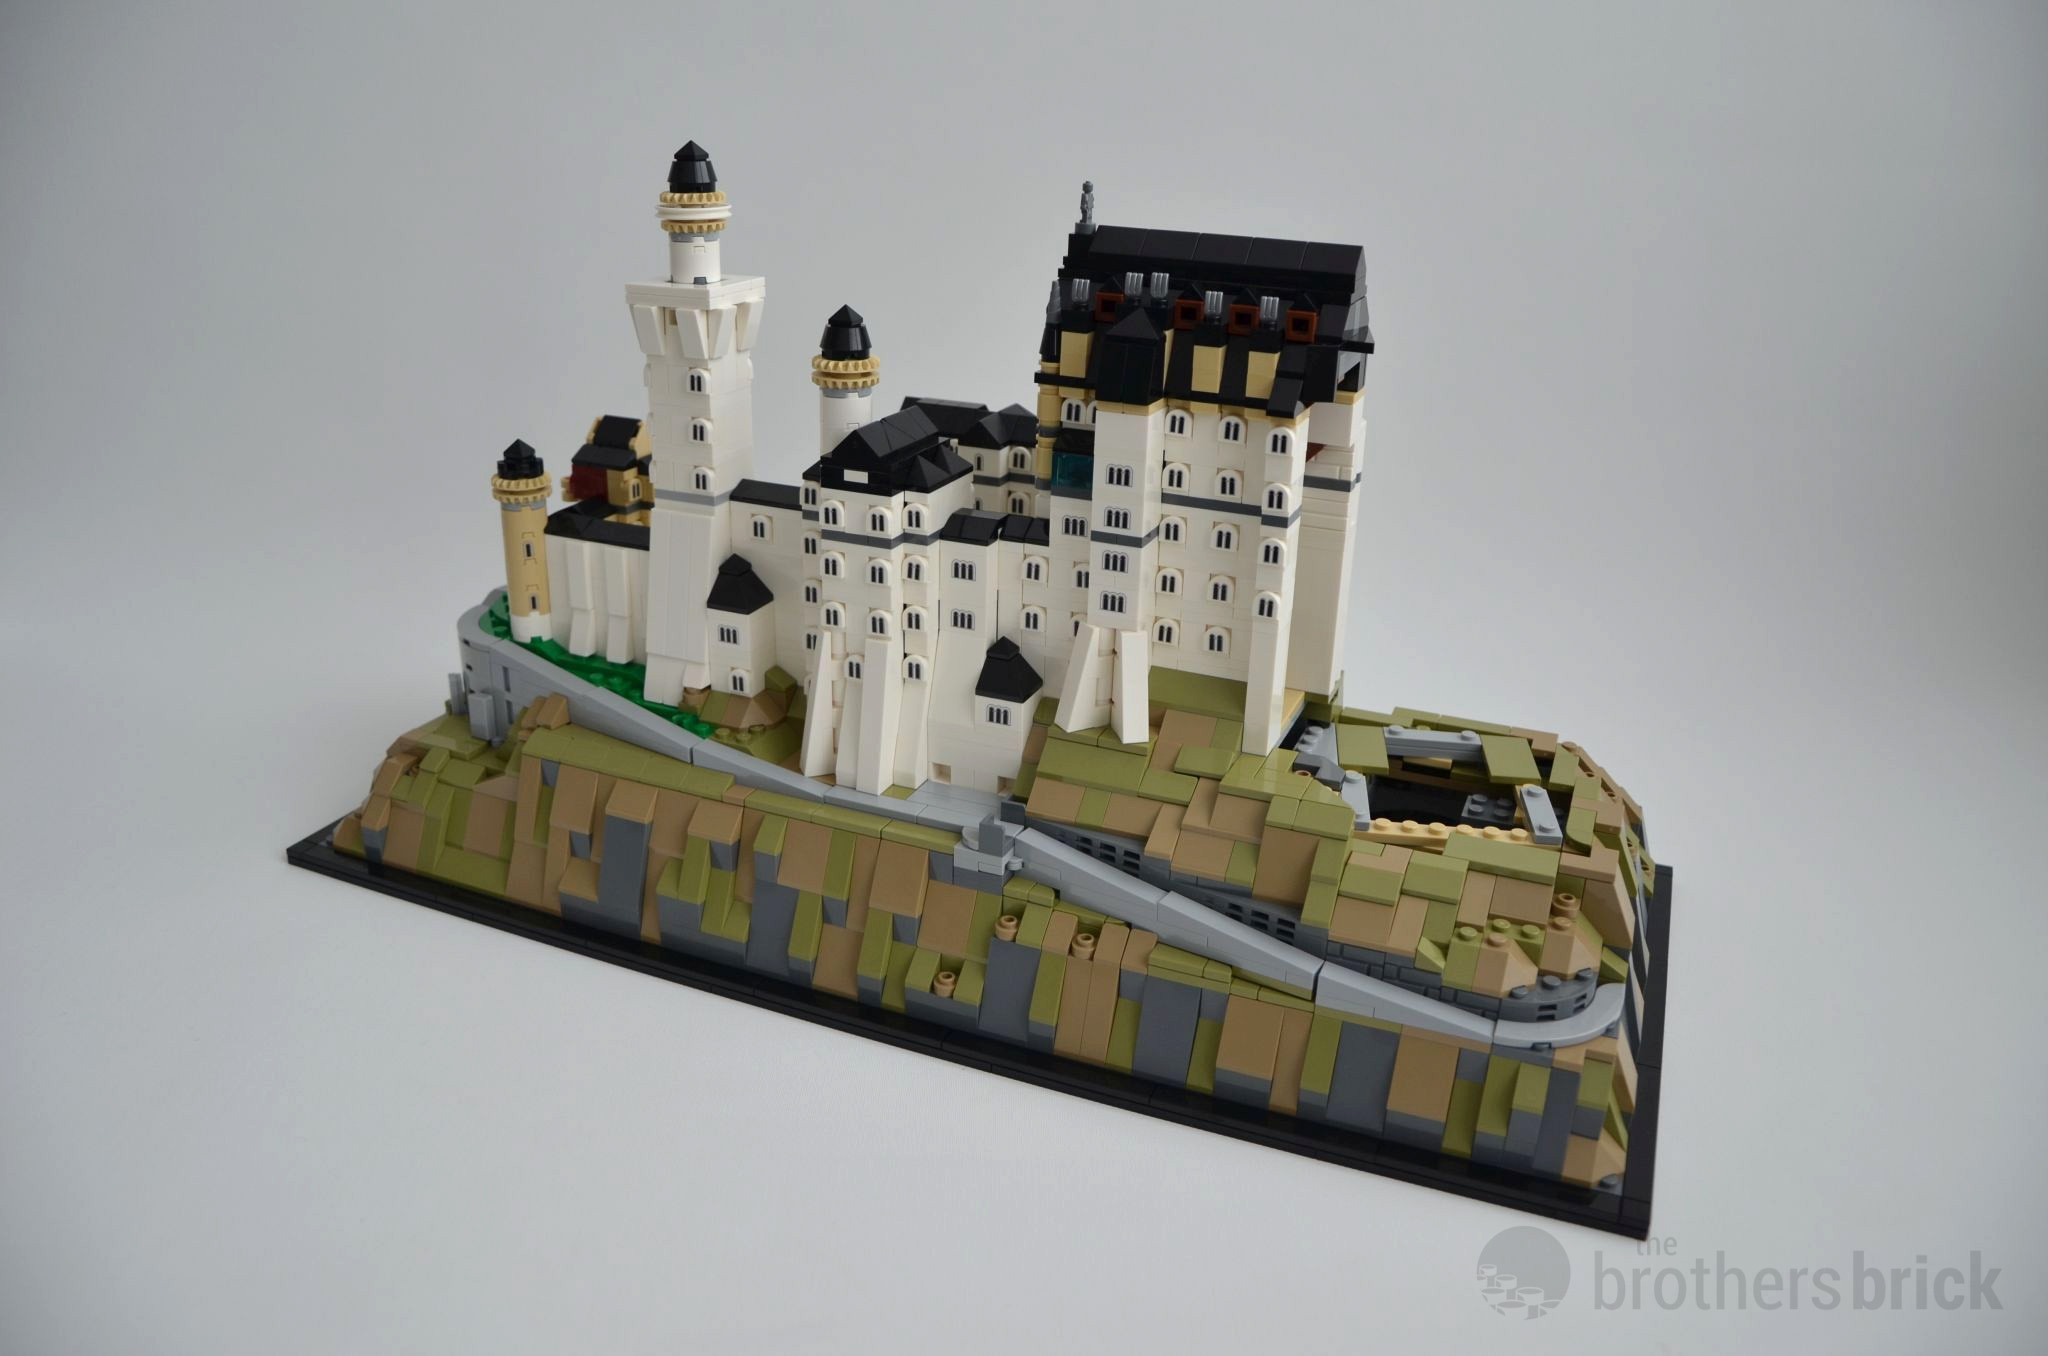
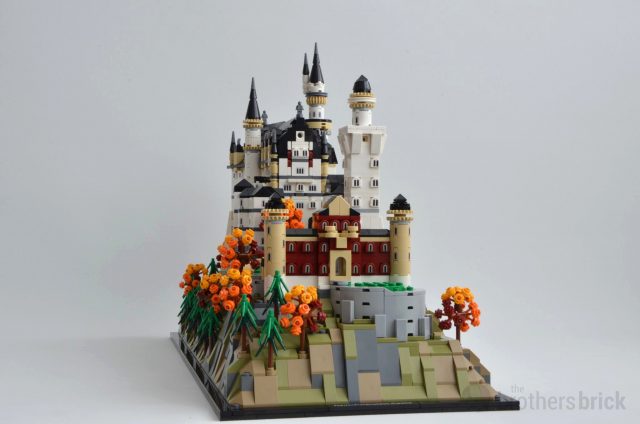
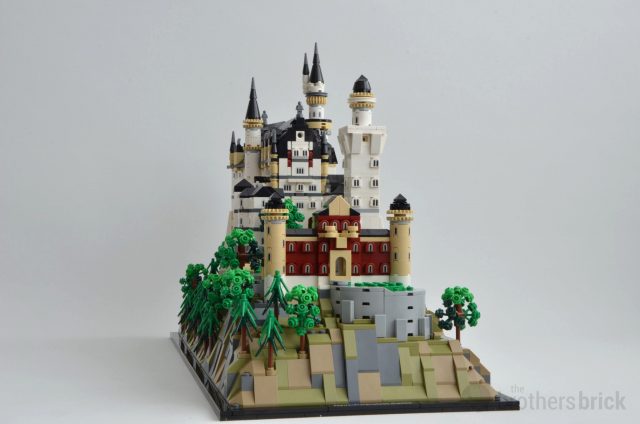
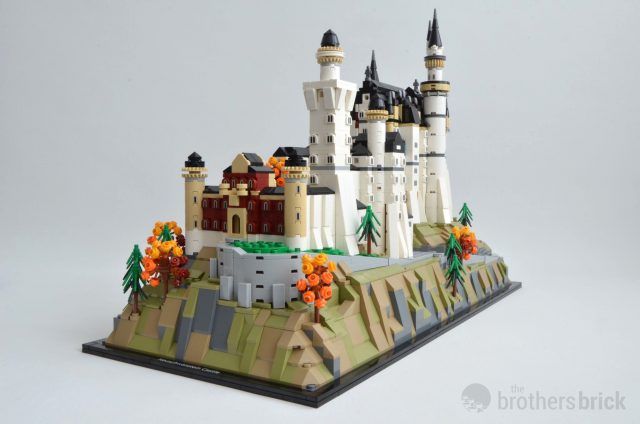
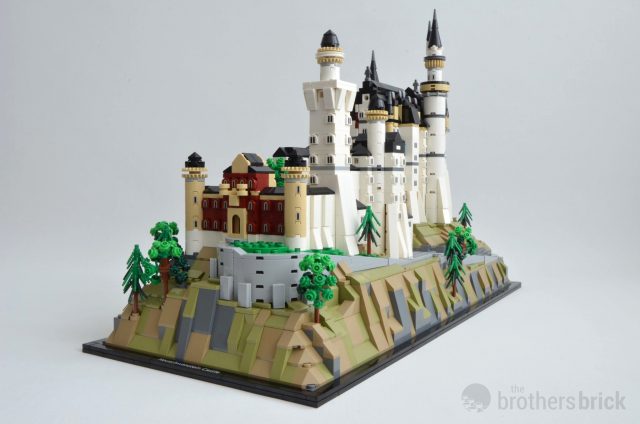
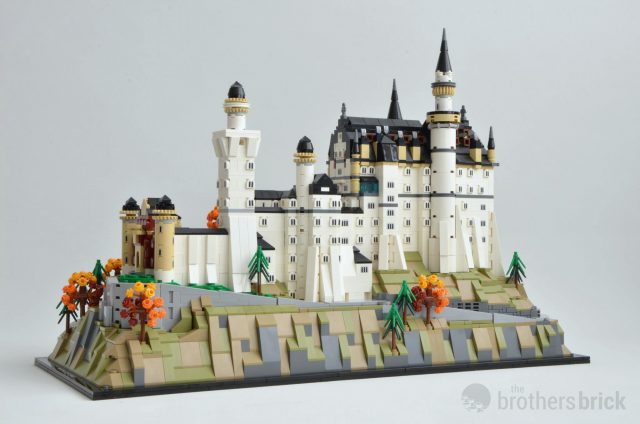
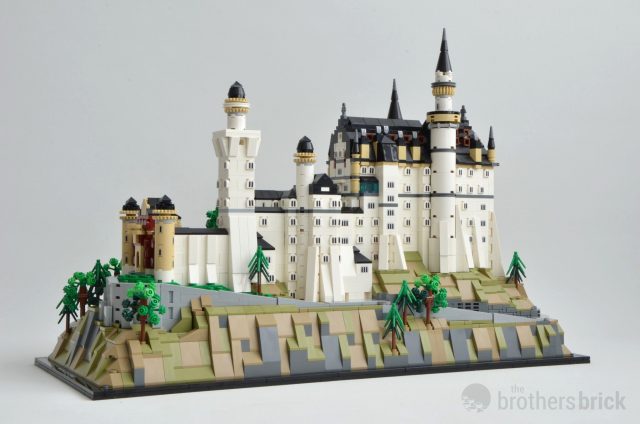
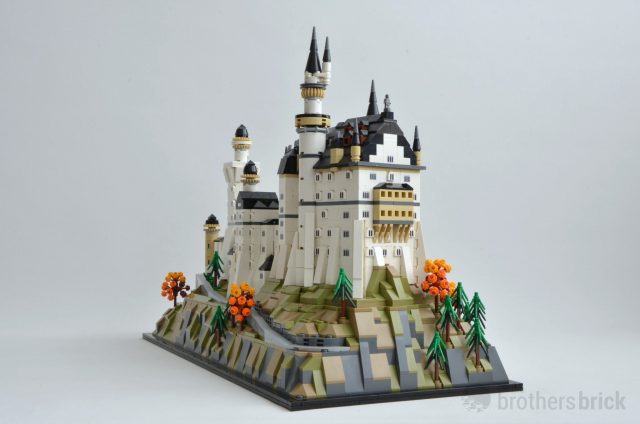
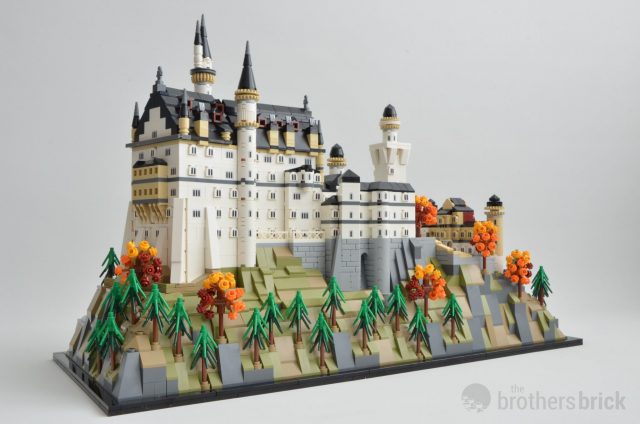
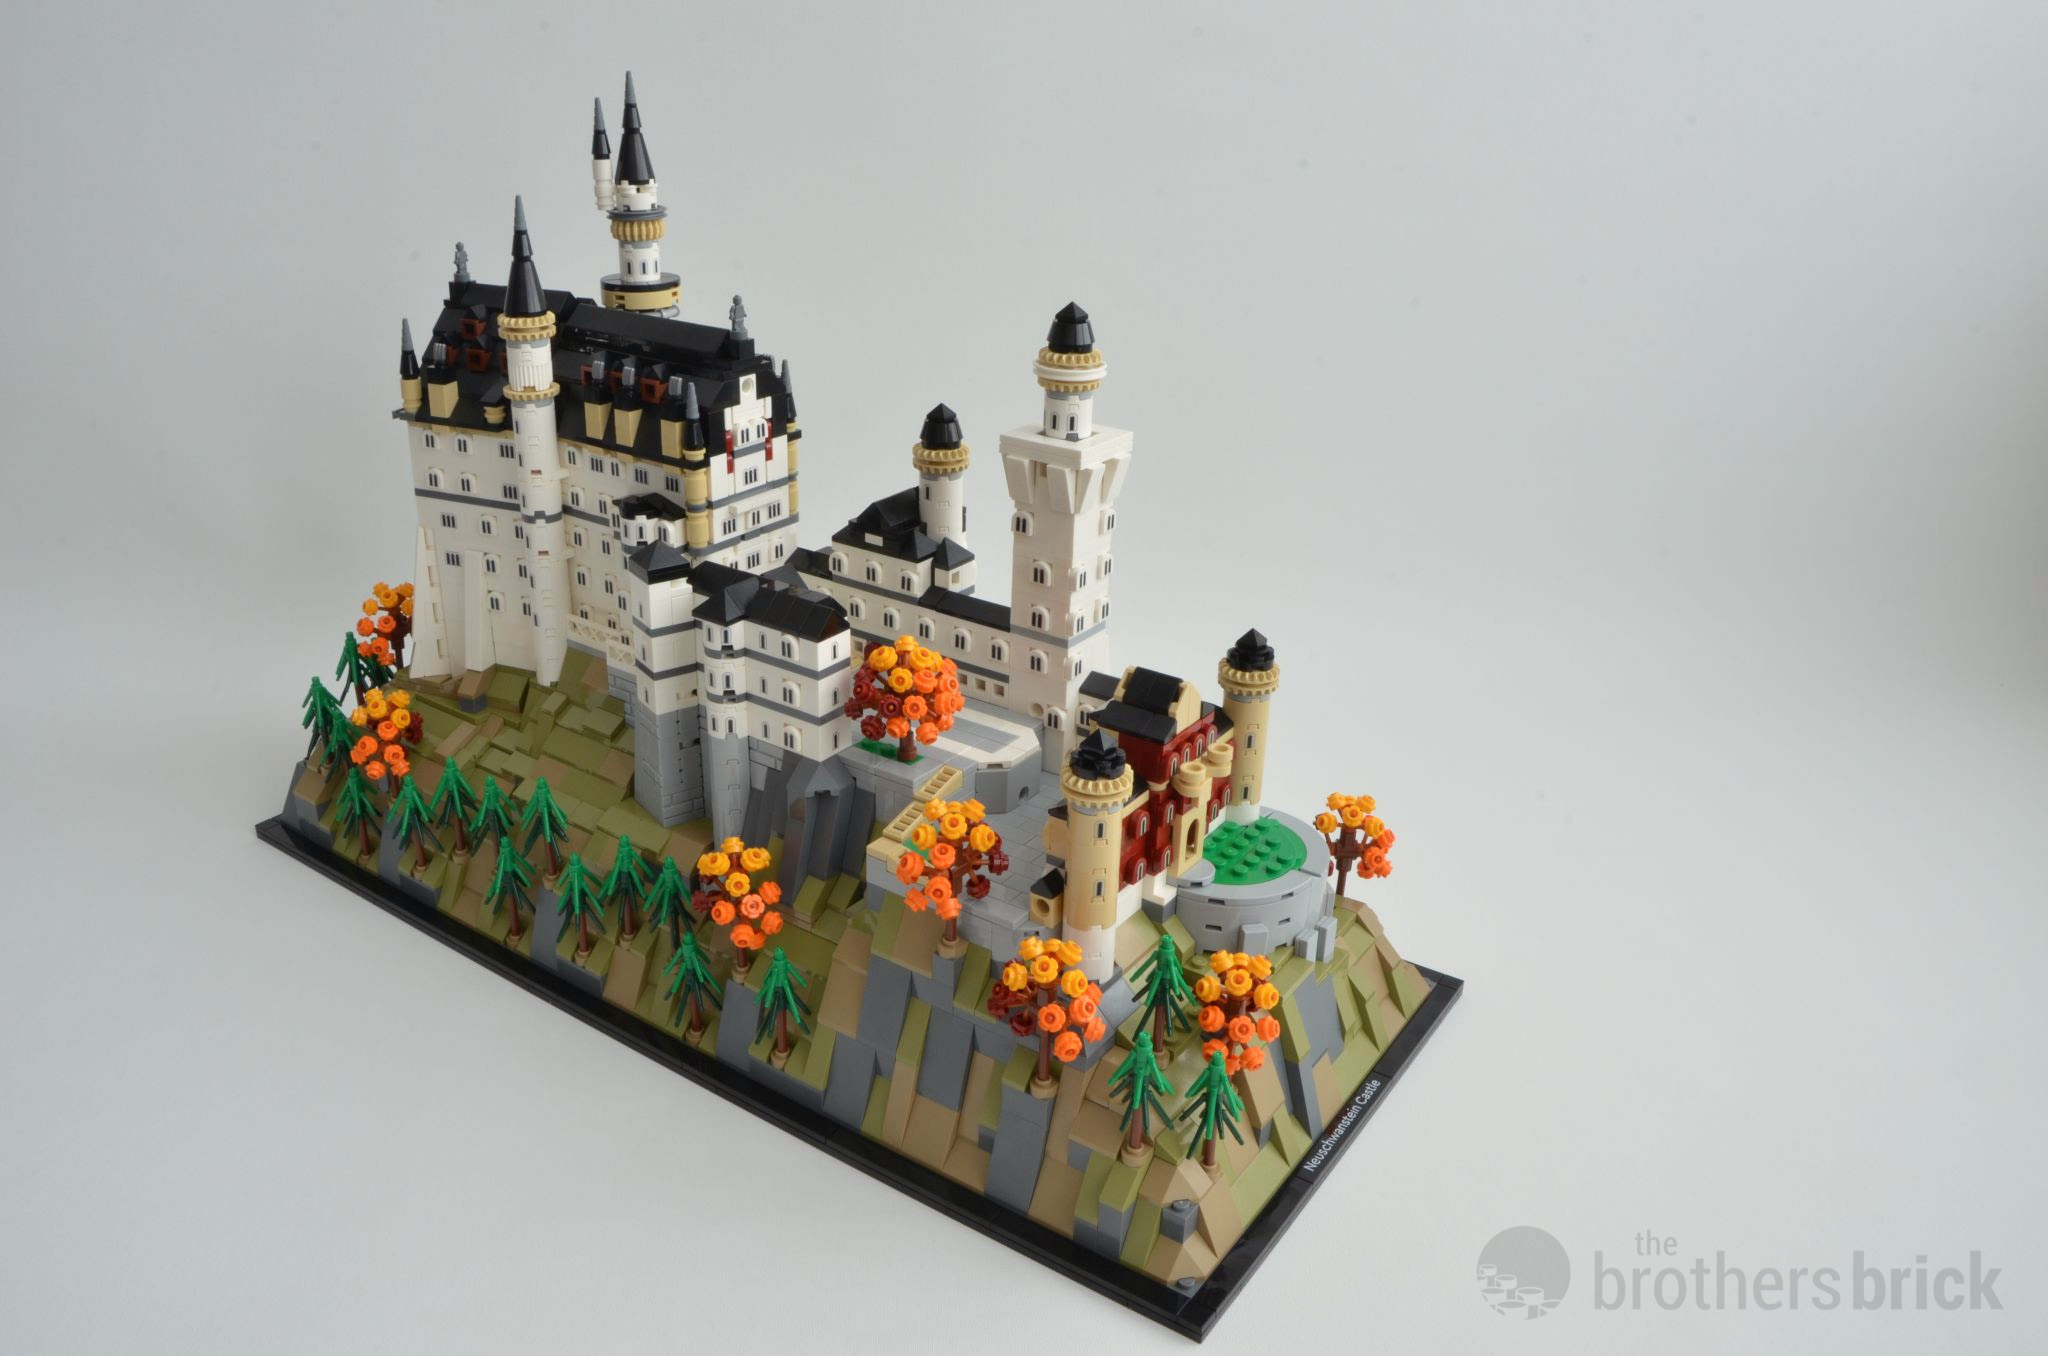
The finished build
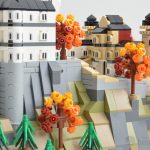
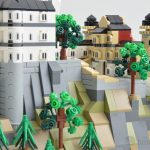
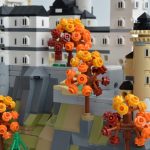
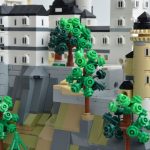
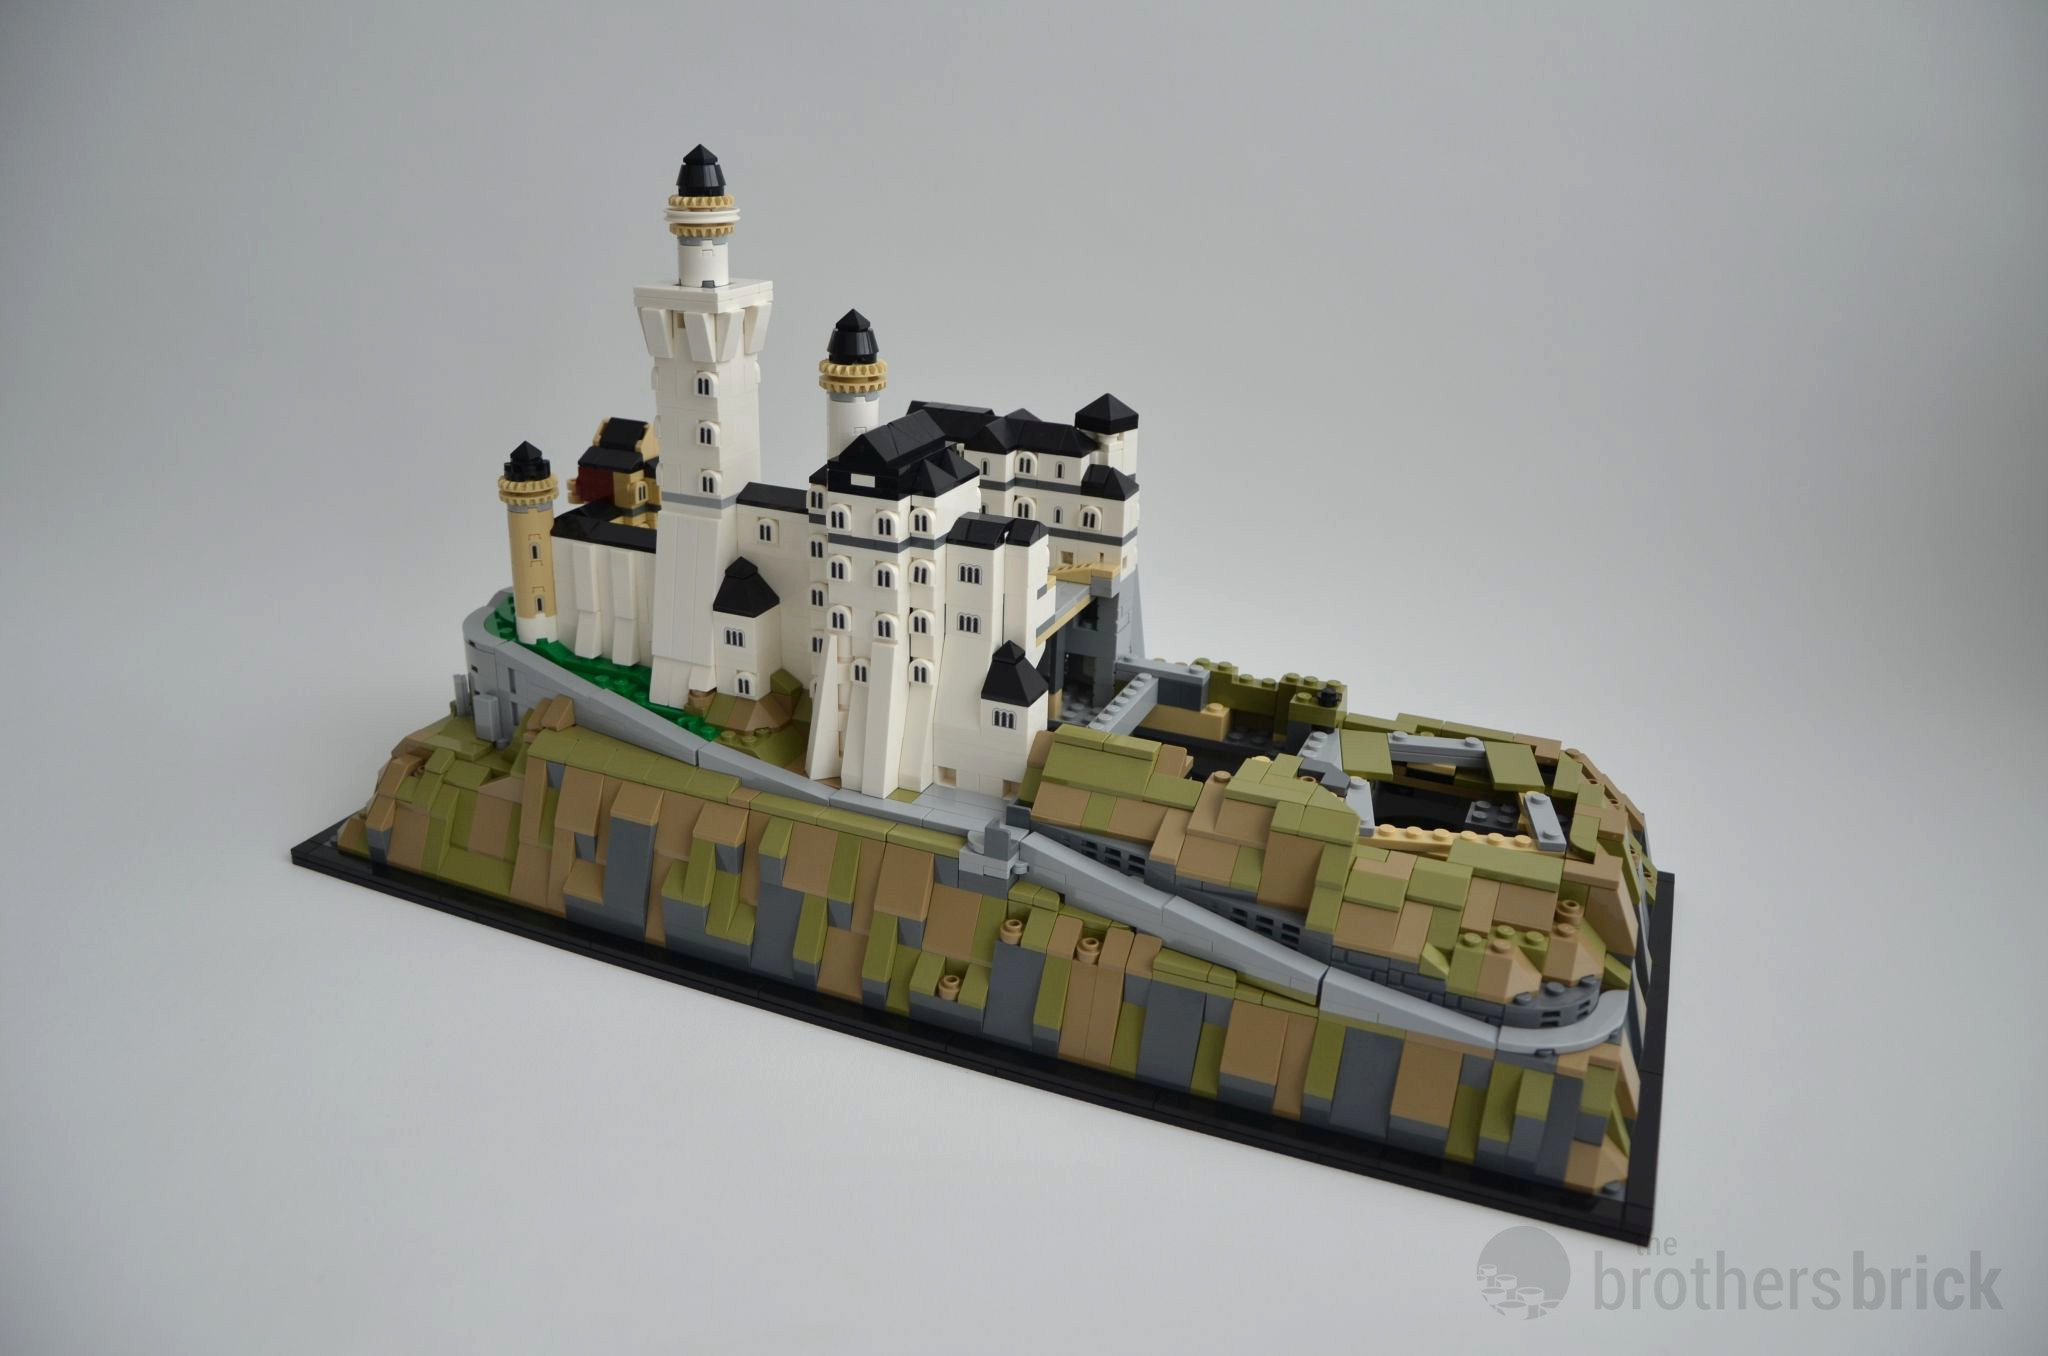
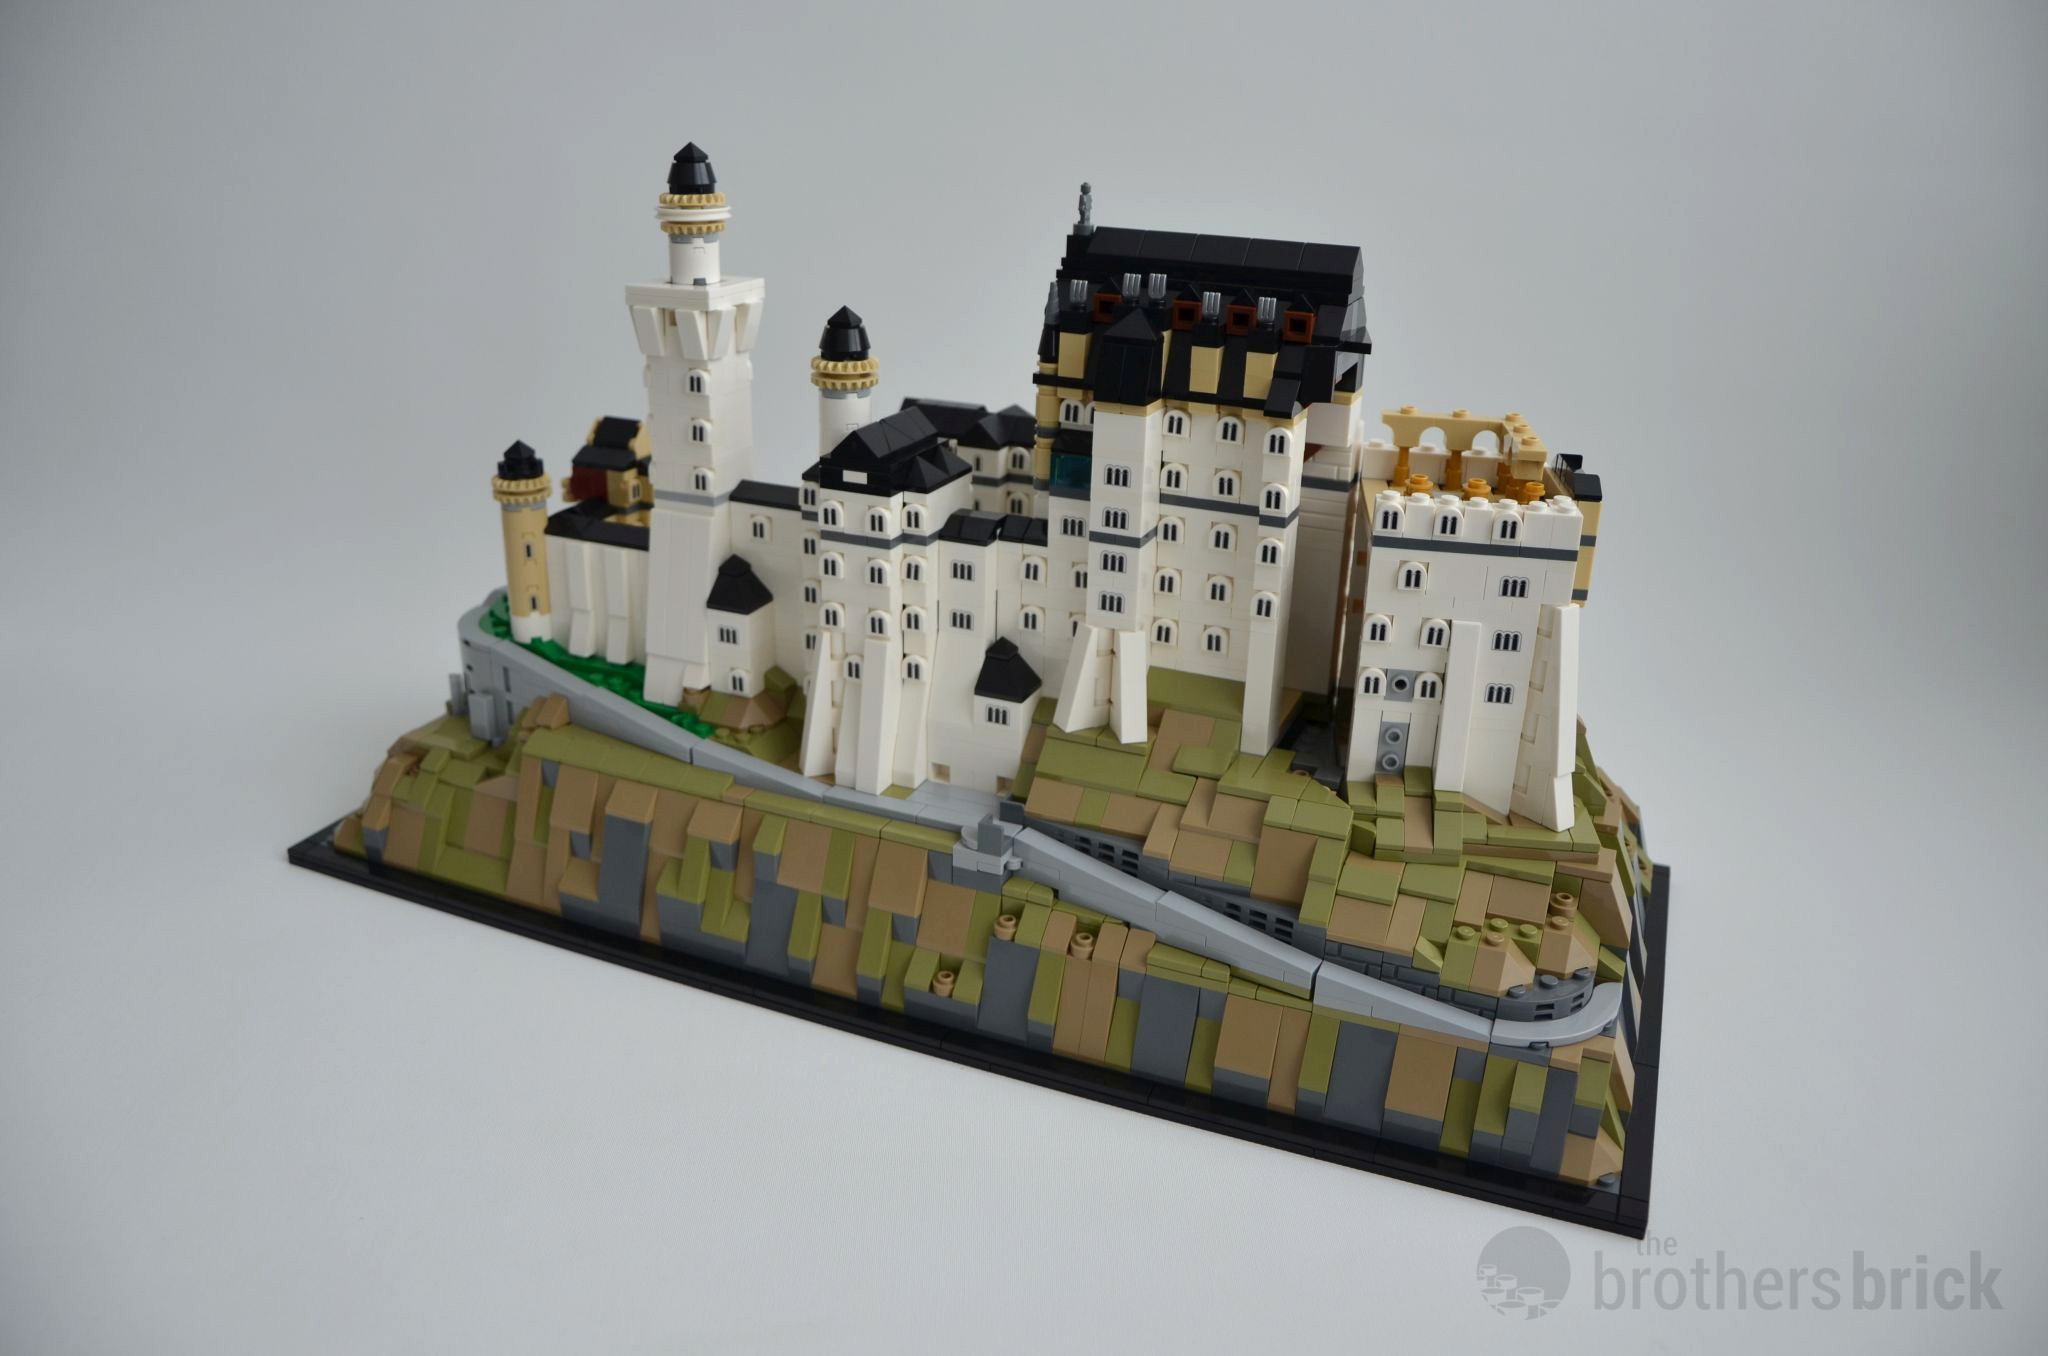
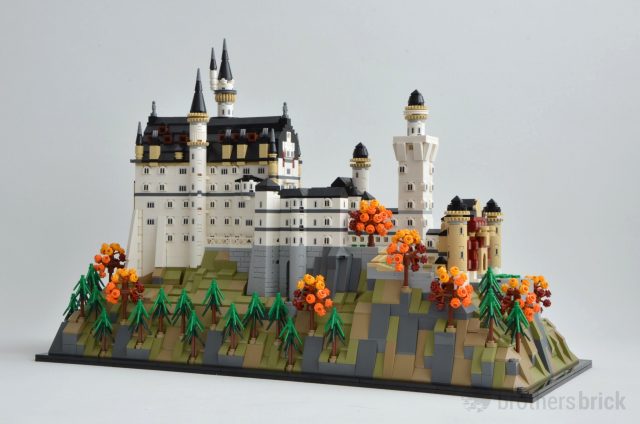
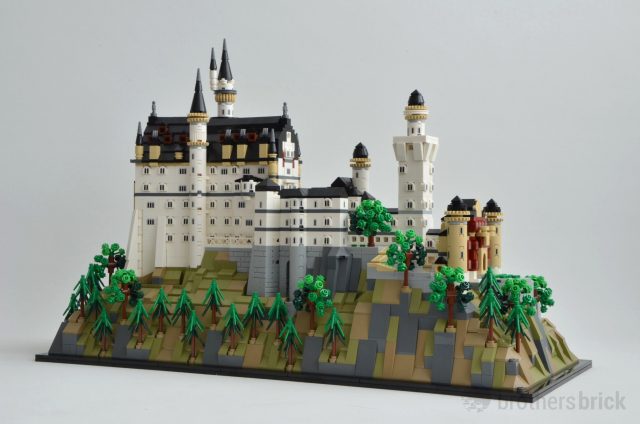
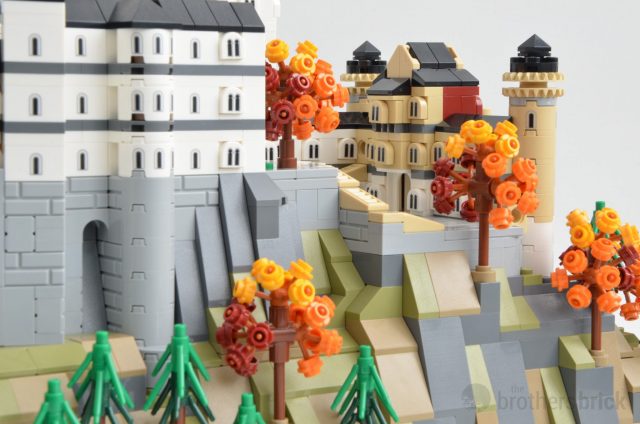
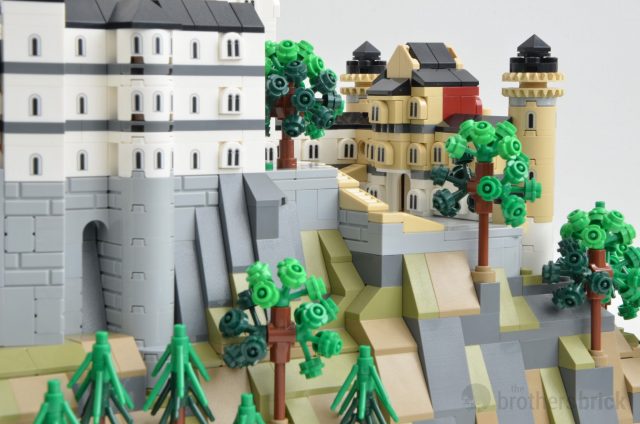
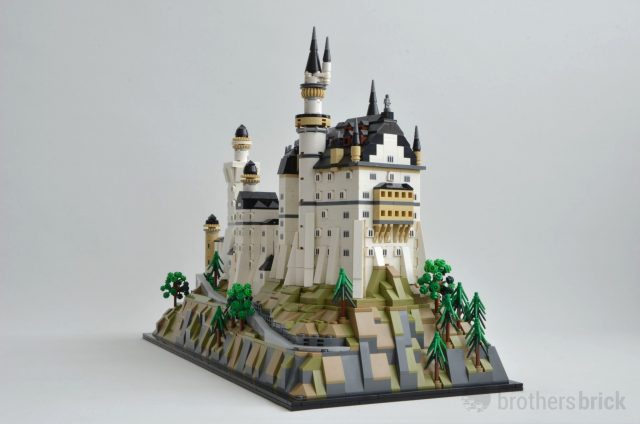
Before you think, hey, I’m seeing double, know that the set is supplied with two options for the leaf colors of the trees just like Himeji Castle. I have opted to make the same photos with both versions to highlight what color will do to the overall look of the castle.
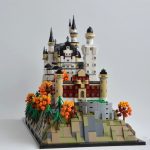
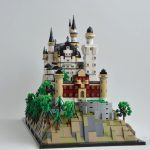
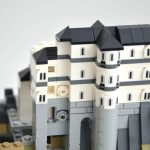
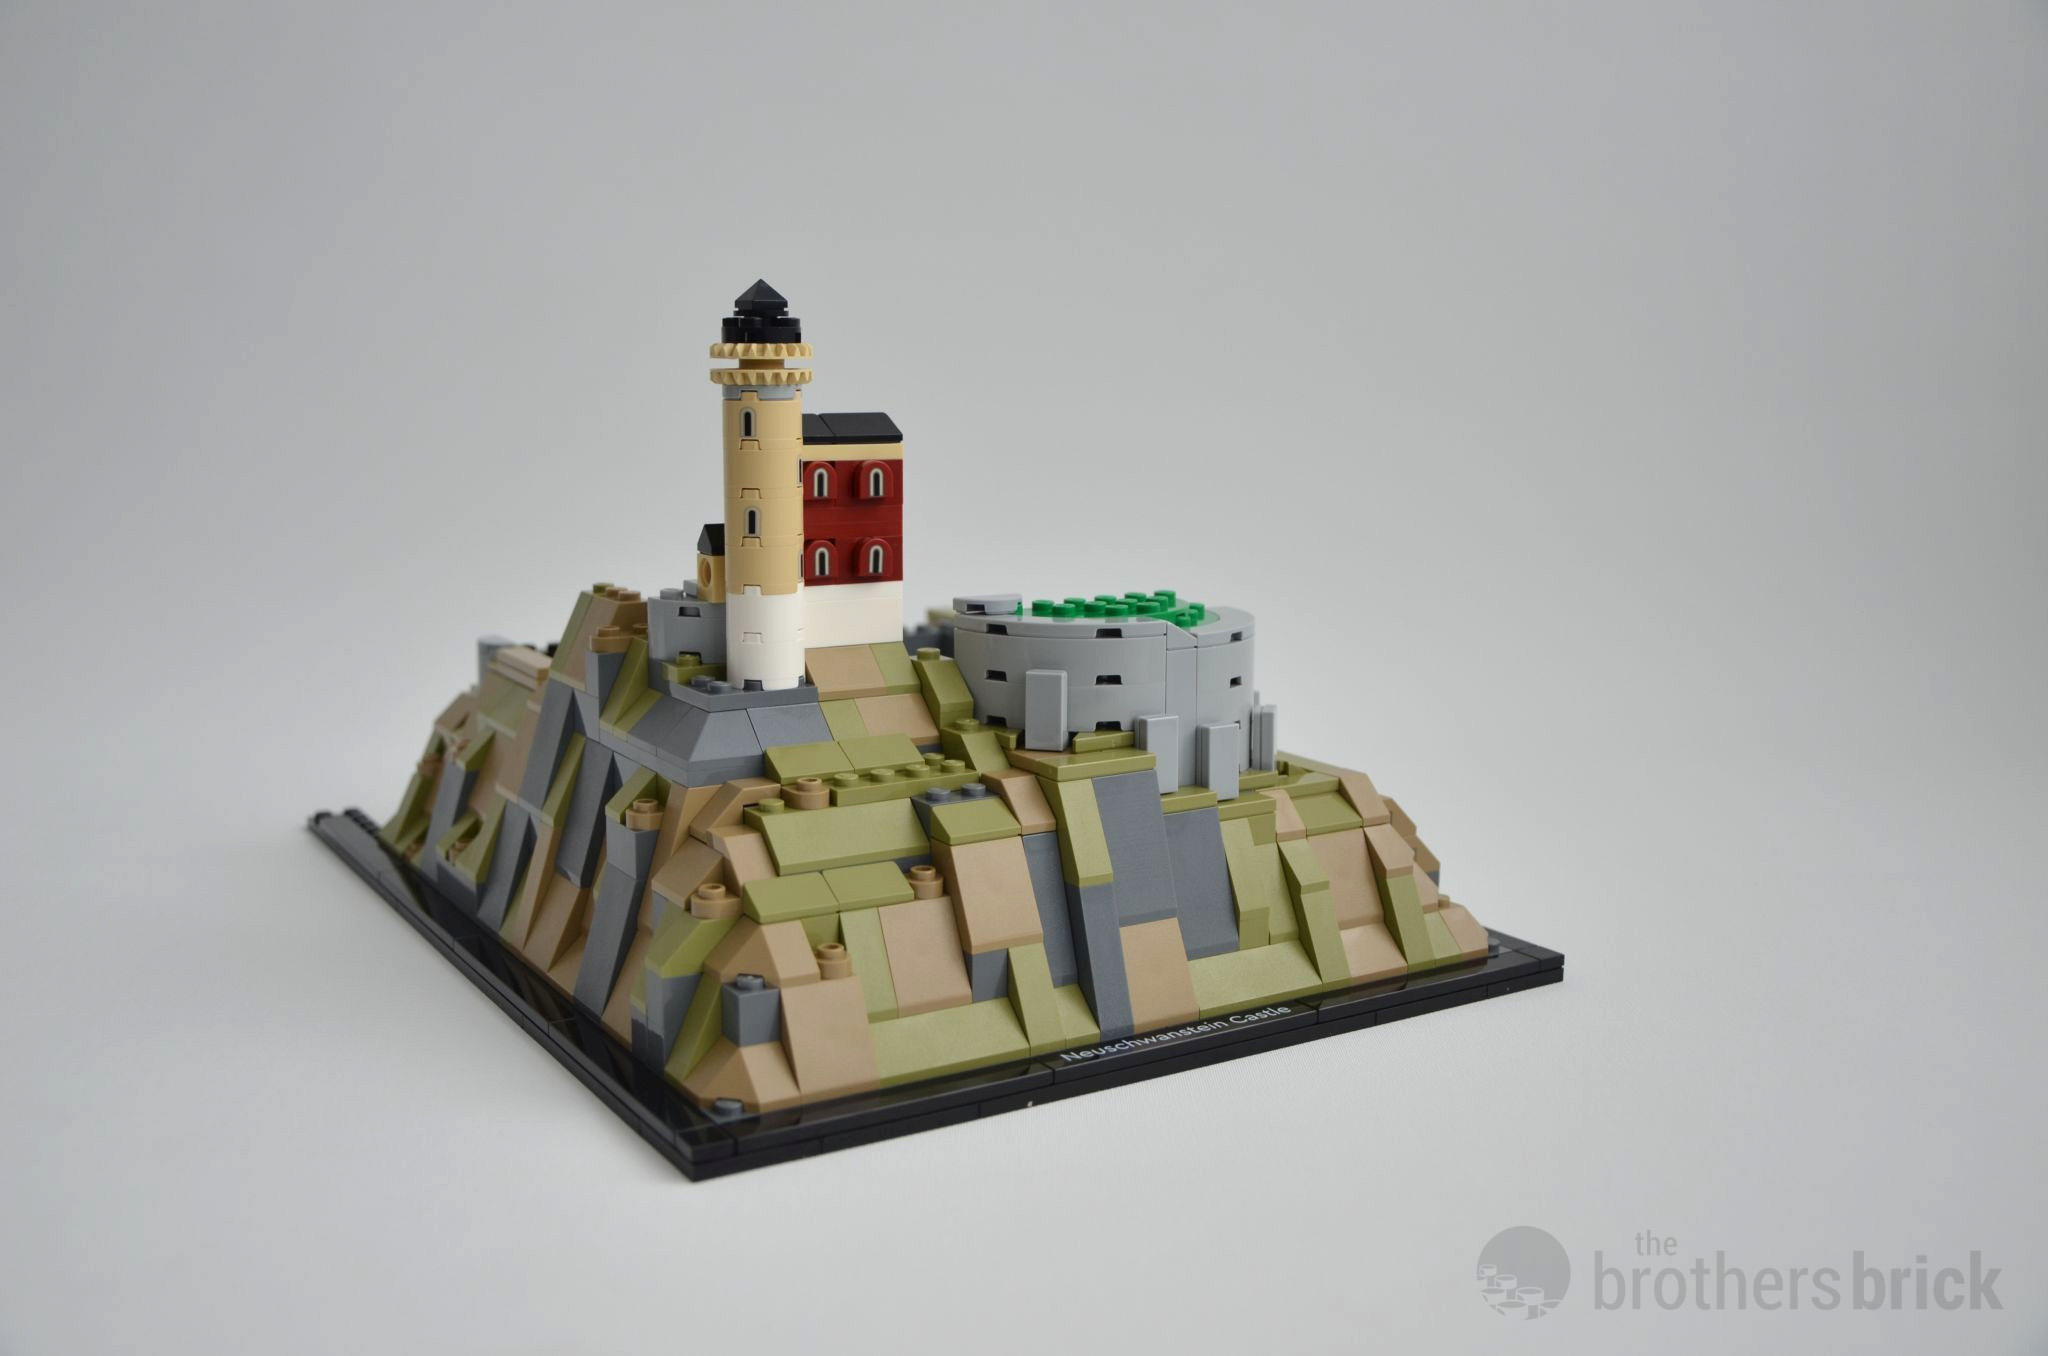
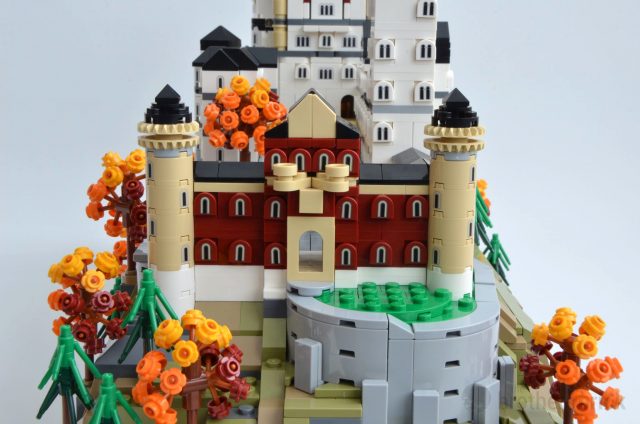
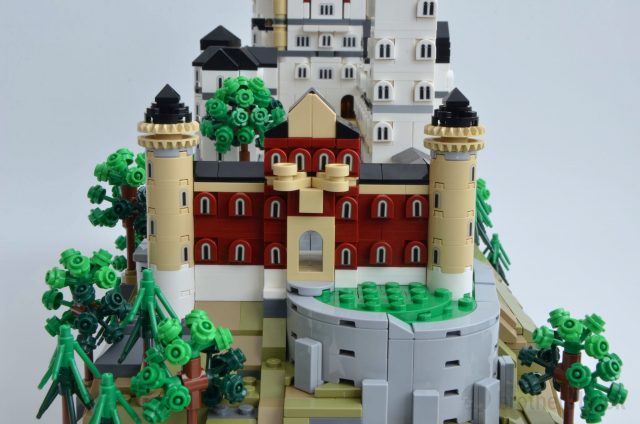
The front of the castle, as it includes the main gate house (and the printed name tile), however some would argue that the previous view of the castle is the more important one as a lot of pictures are also taken of that side.
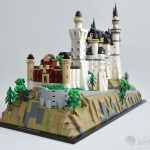
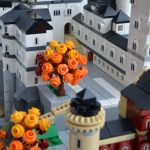
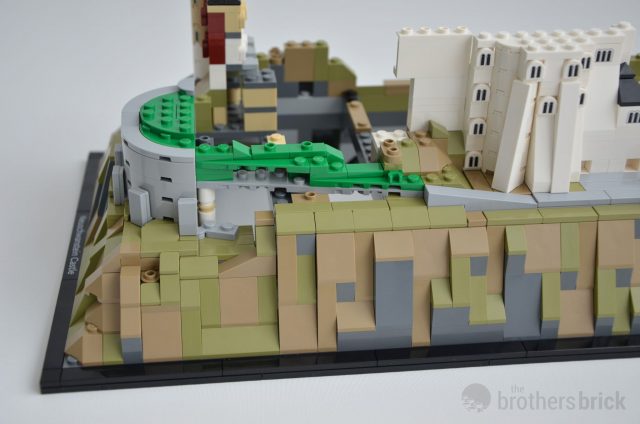
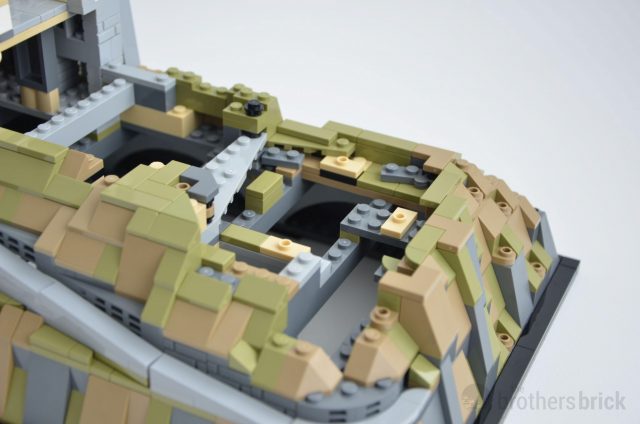
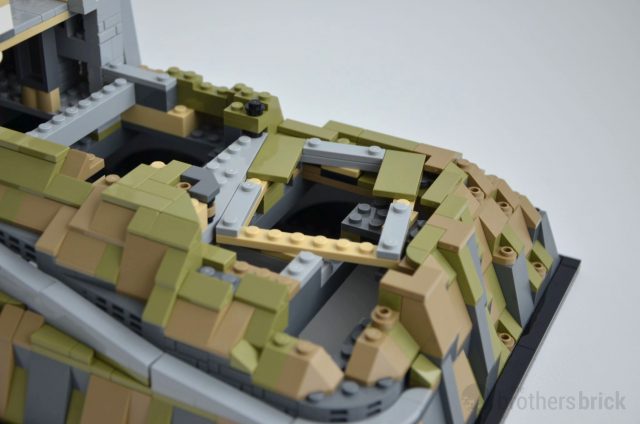
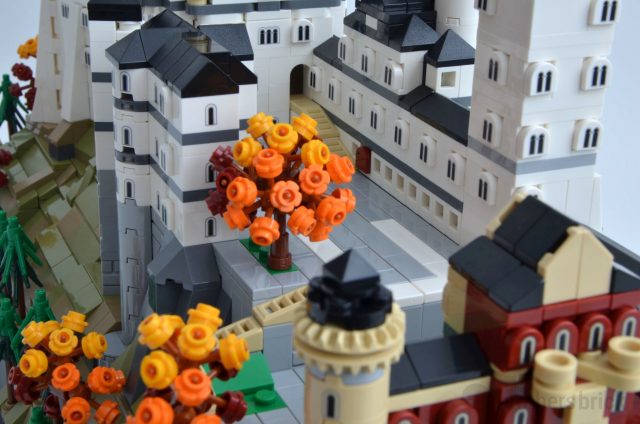
Some details of the lower courtyard…

And some details of the upper courtyard, with the entrance to the Palas at the end.
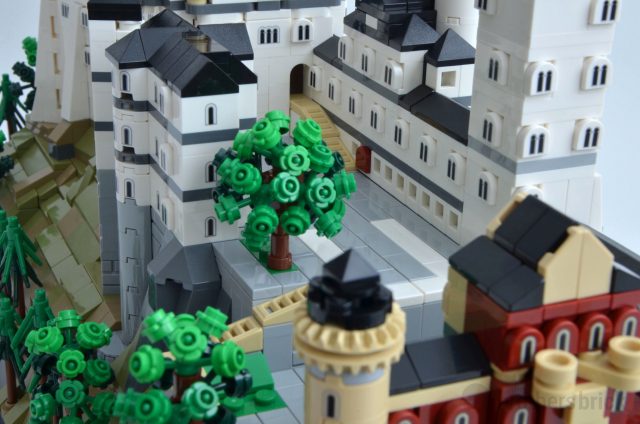
A little close-up of the main gate house and the road leading up to the castle.
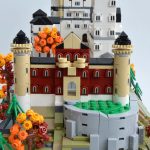
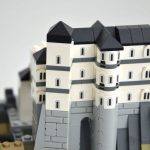
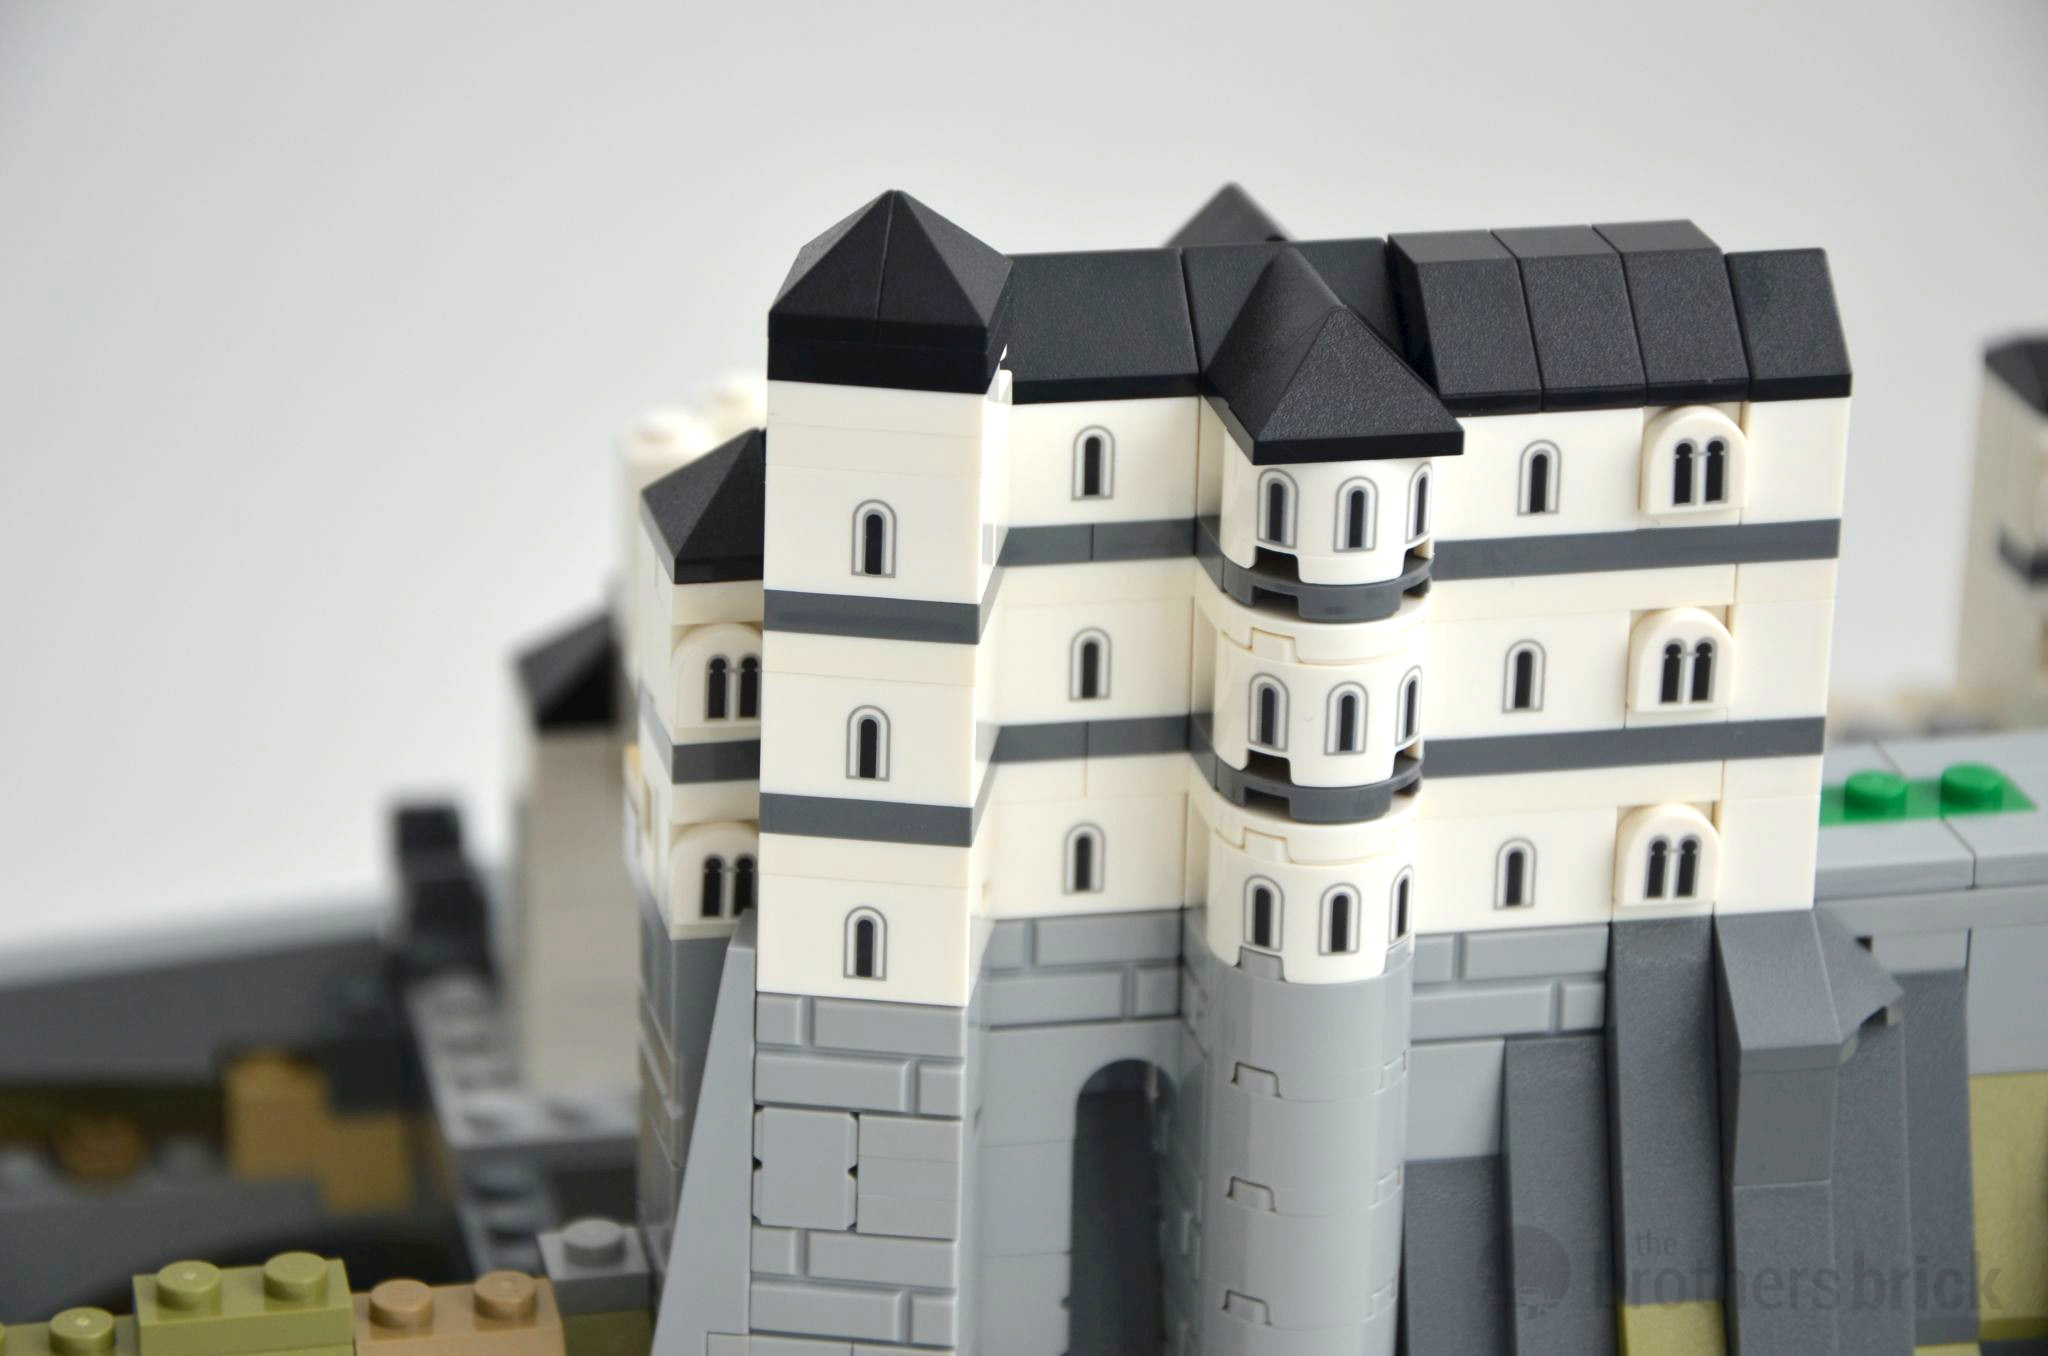
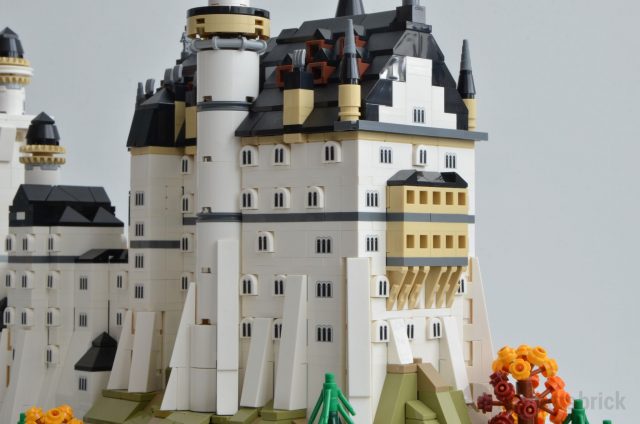
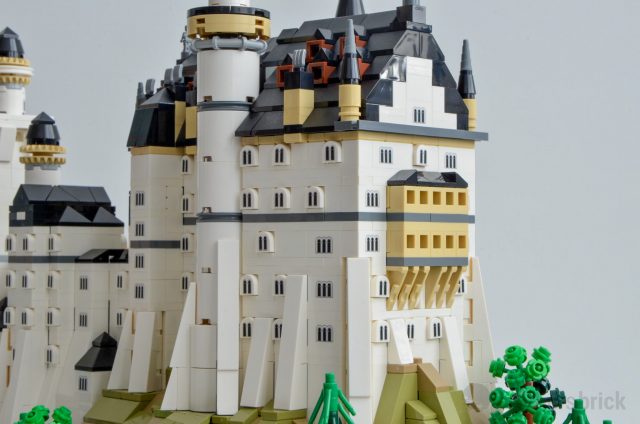
I am not entirely sure if the roof captures the right feeling of the stepped gable of the original. Working with this little space, however, does not leave many options . What could have easily been changed is the piece behind the tan 1×1 tile. Looking at pictures of the castle, I think that a dark red piece to attach the 1×1 tile should have been tan instead of dark red. Speaking of the dark red, maybe dark orange or medium nougat could have been used to better represent the bricks used in the real castle (where is that new brick color?).
Taking the corner and the road continues downwards.
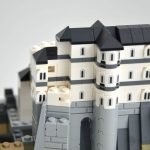
Between the gatehouse and the base of the large square tower, the white wall lack any windows, while on the real castle some windows are present. Adding those would have helped it looking less empty and more detailed. The big round tower also lacks any printed windows, because of the use of the large 3×3 round pieces, however, the notches between bricks can be interpreted as small windows, which gives the large round tower some needed detail.
We can follow the road almost down, except it ends just before the edge, on a 2×2 sloped roof brick.
A more detailed picture with a different view of the two story balcony, the wedge plates give the just the right structure for the support of the balcony. Also worth to mention is the nice usage of the forks for the chimney.
And finally a view of the castle as seen on a lot of pictures on the Internet, with the balcony and the gate behind some trees.

Conclusions and recommendations
This is a very nice set, and if you have the room to spare it’s a great display model.
Of the two options for the trees, the autumn colors really give the set some more much needed color and it’s the one I prefer. However, as one might want to change them, I think it would have been a welcome addition to include a storage space for the alternative trees inside the model. As the space beneath the castle is mostly unused, it could have been a nice place to store them.
The build took me about 9 hours with some small breaks in between, but with a few exceptions, it isn’t too demanding with advanced techniques. What it does include though, are a lot of 1×1 bricks and pieces. Just too name a few, we have 149 white headlight bricks, 88 1×1 bricks in white, the earlier mentioned 134 decorated white window tiles, and more in tan and dark red. Stacking and aligning them all can test one’s patience, but thankfully these more laborious steps are spread throughout the build, adding a max of 5 per step to prevent it from getting tedious.
As the castle is quite varied there are not a lot of places were techniques are repeated, which adds to the build experience. I really liked to see how the various towers and angled bits connected and came together while building the set, even the more tedious mountain parts were spread across the build instead of all at the beginning as the mountain does take quite some time (and pieces) to build.
The castle feels a bit smaller than one might think upon hearing the piece count, but this again is due to the amount of small pieces used.
If I where to mention some small nitpicks, some of the gables, both on the gatehouse and the main Palas, could have been a little cleaner. Representing the brick color of the gate house with dark red also feels a little on the dark side compared to the actual castle.
For the many arched windows, in the real castle they are recessed into the wall, but as they are reproduced with the printed tiles on the Lego model, they are conspicuously raised. I have to wonder if just normal 1×1 bricks with printed windows, like those found in the Hogwarts Castle, set 76419 (Brick 1 x 1 with Silver Arched Window with Dark Brown Lattice and Dark Tan Arches Pattern) would not have been easier for the model instead of tiles on headlight bricks, both in reducing the piece count, as well as reducing the window sub-assembly to give almost the same look to the castle.
Small critiques aside, this is a fabulous display piece where the shapes and features of the real castle have been nicely captured in the set.
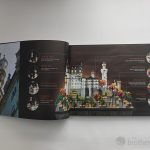
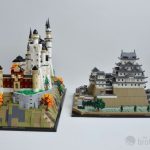
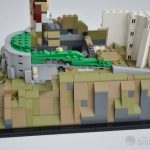
Comparison to Himeji Castle
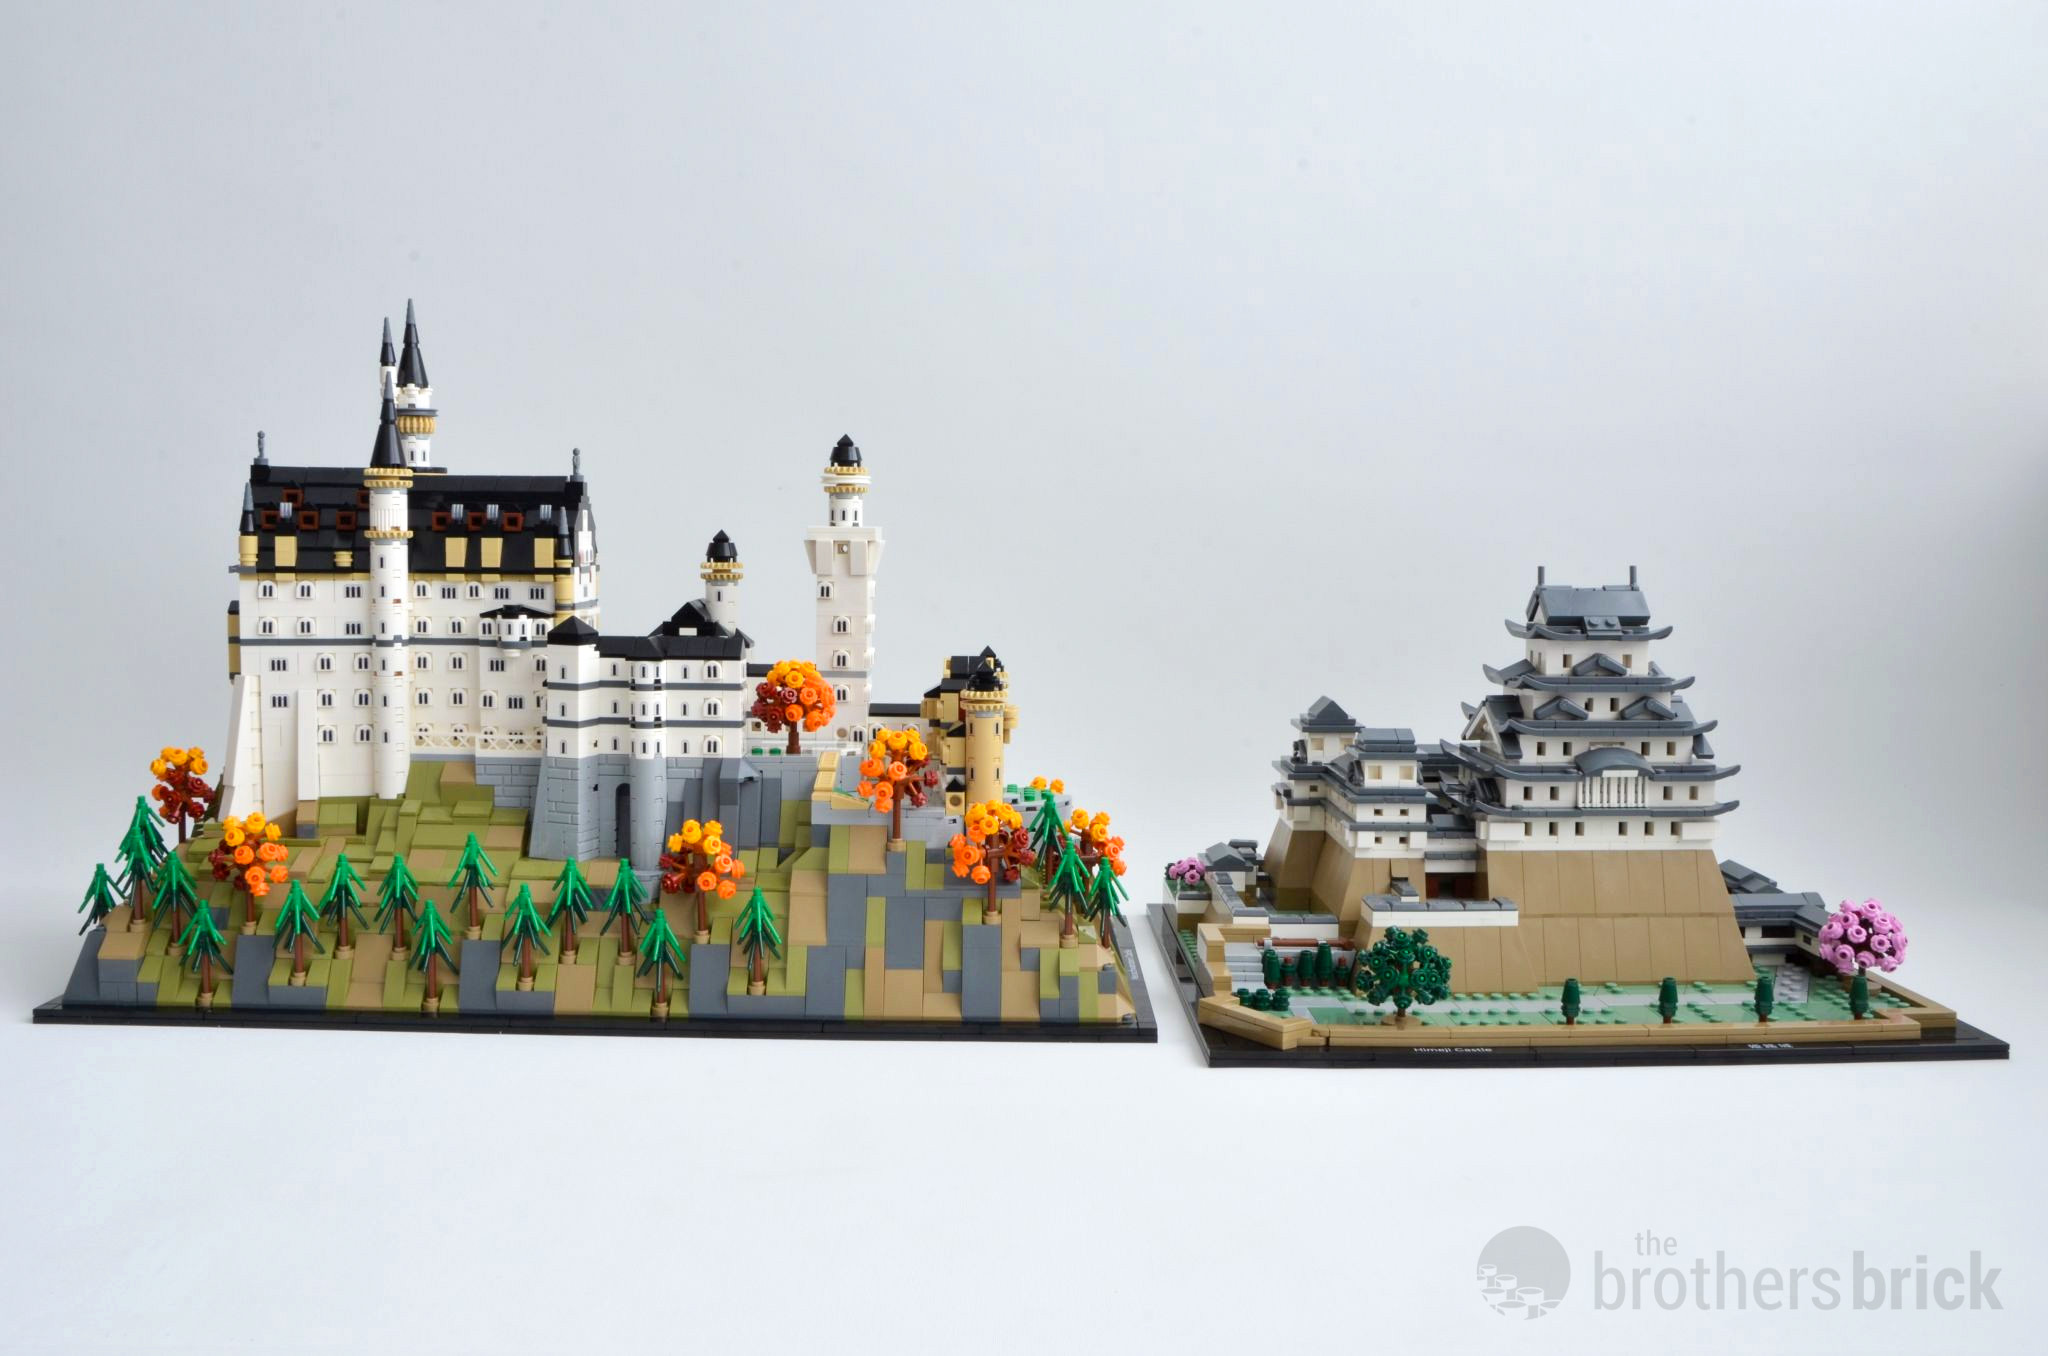
A little bonus to the review, how well does this new castle compare to the last Architecture castle set?
As you can see, the castle looks totally different depending how you display the set. With the nameplates both towards the viewer, Neuschwanstein Castle is much more narrow and deep. I think this configuration is less suited for display as you need more depth. If name labels are important to you, you could display it like this on a table.
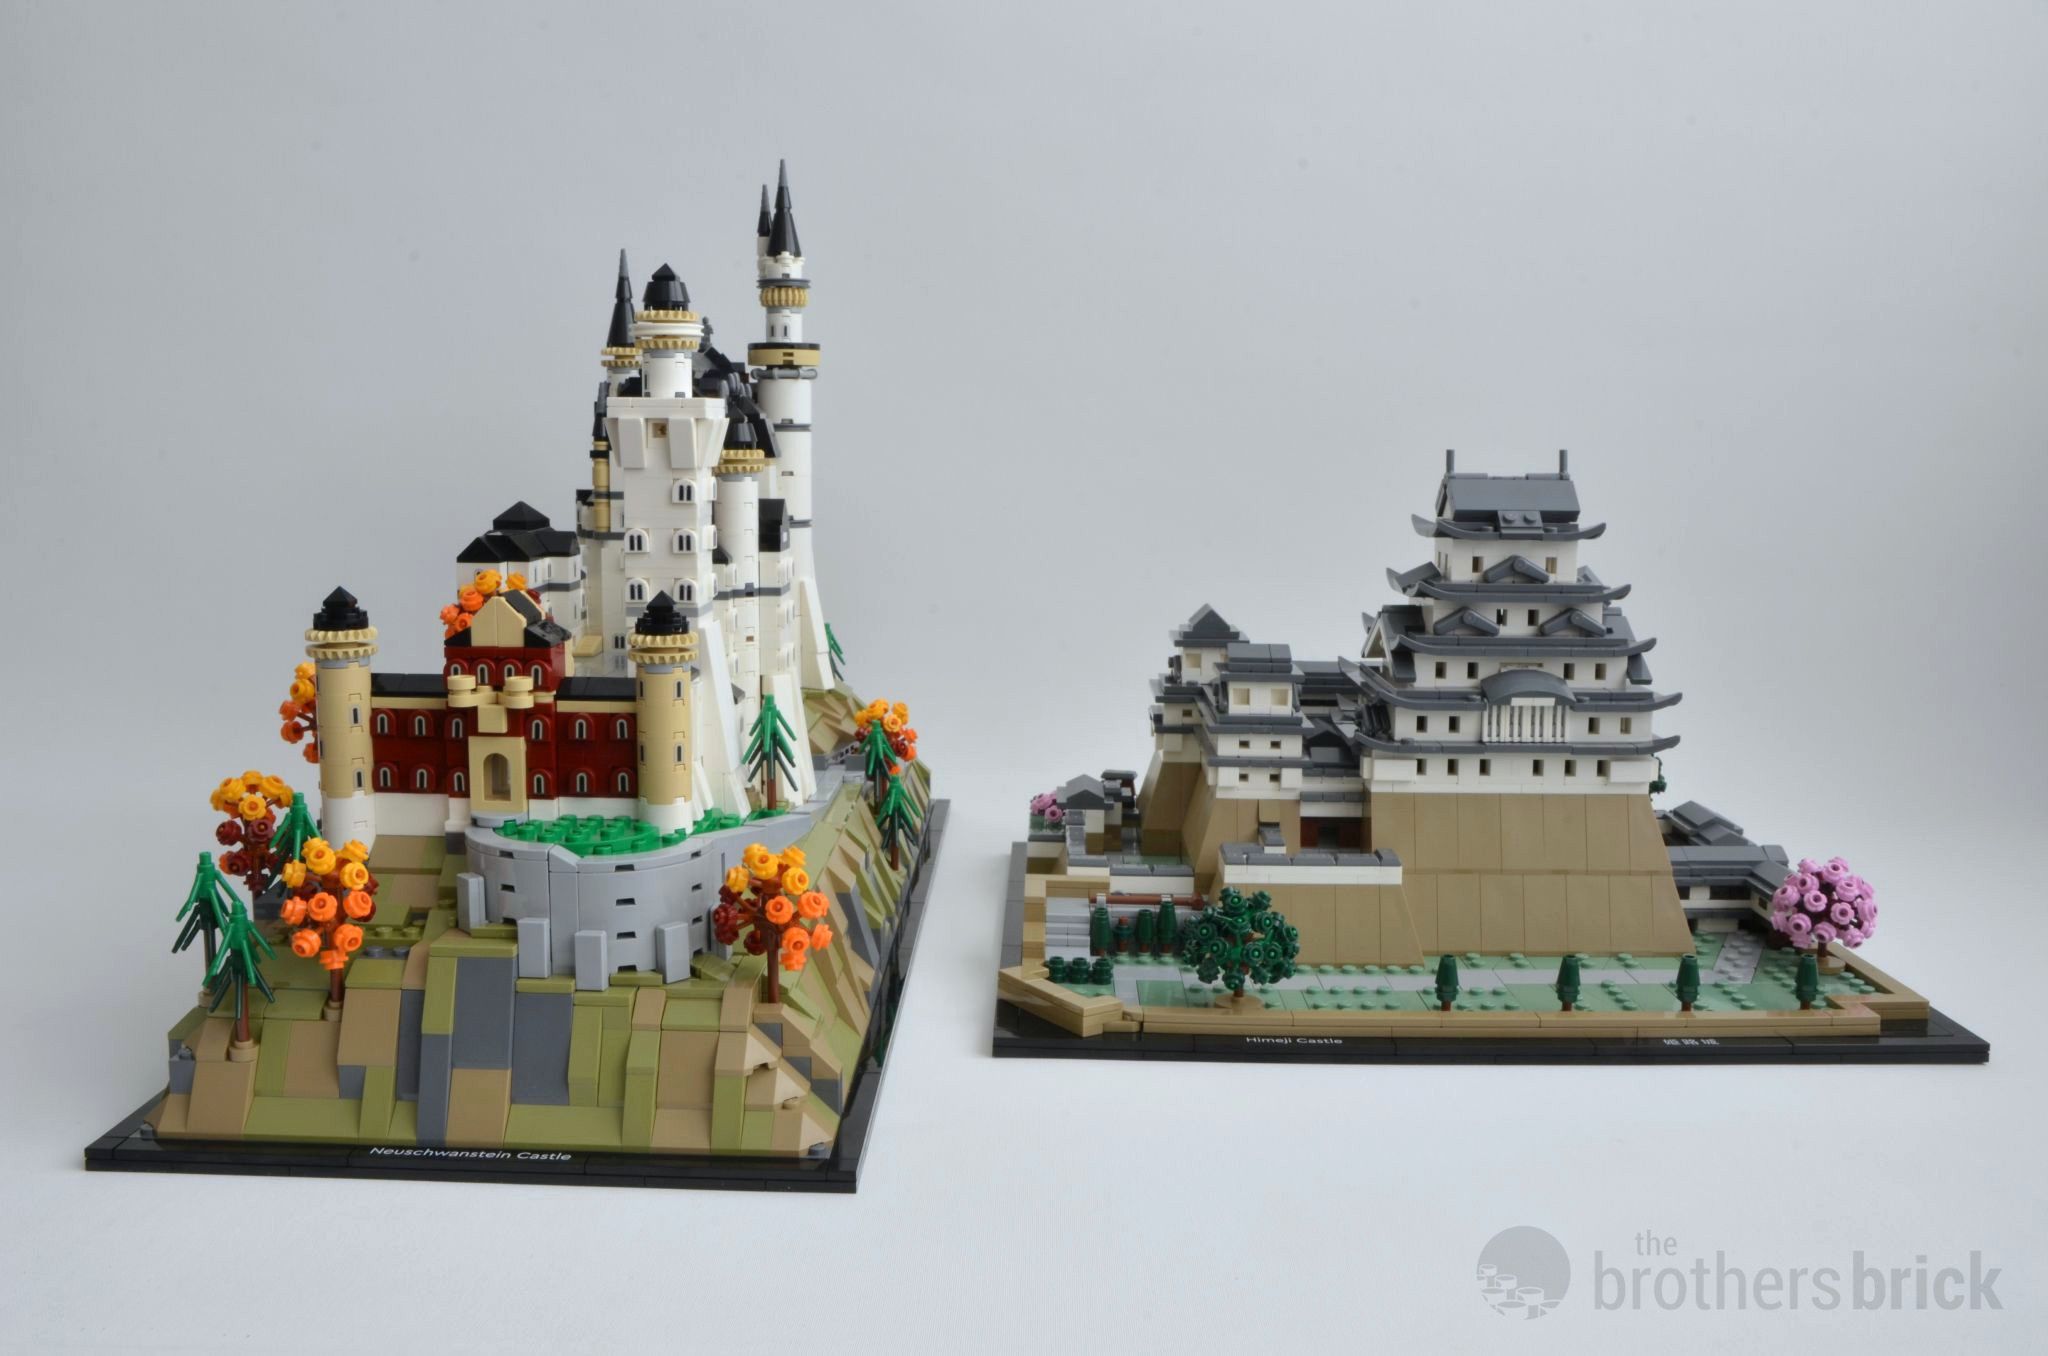
Rotating the set 90 degrees, Neuschwanstein Castle becomes much easier to display alongside Himeji Castle on the right.
LEGO Architecture 21063 Neuschwanstein Castle contains 3,455 pieces and is available on August 1 for US $279.99 | CAN $349.99 | UK £239.99 It may also be available from third-party retail sites like eBay or Amazon.